


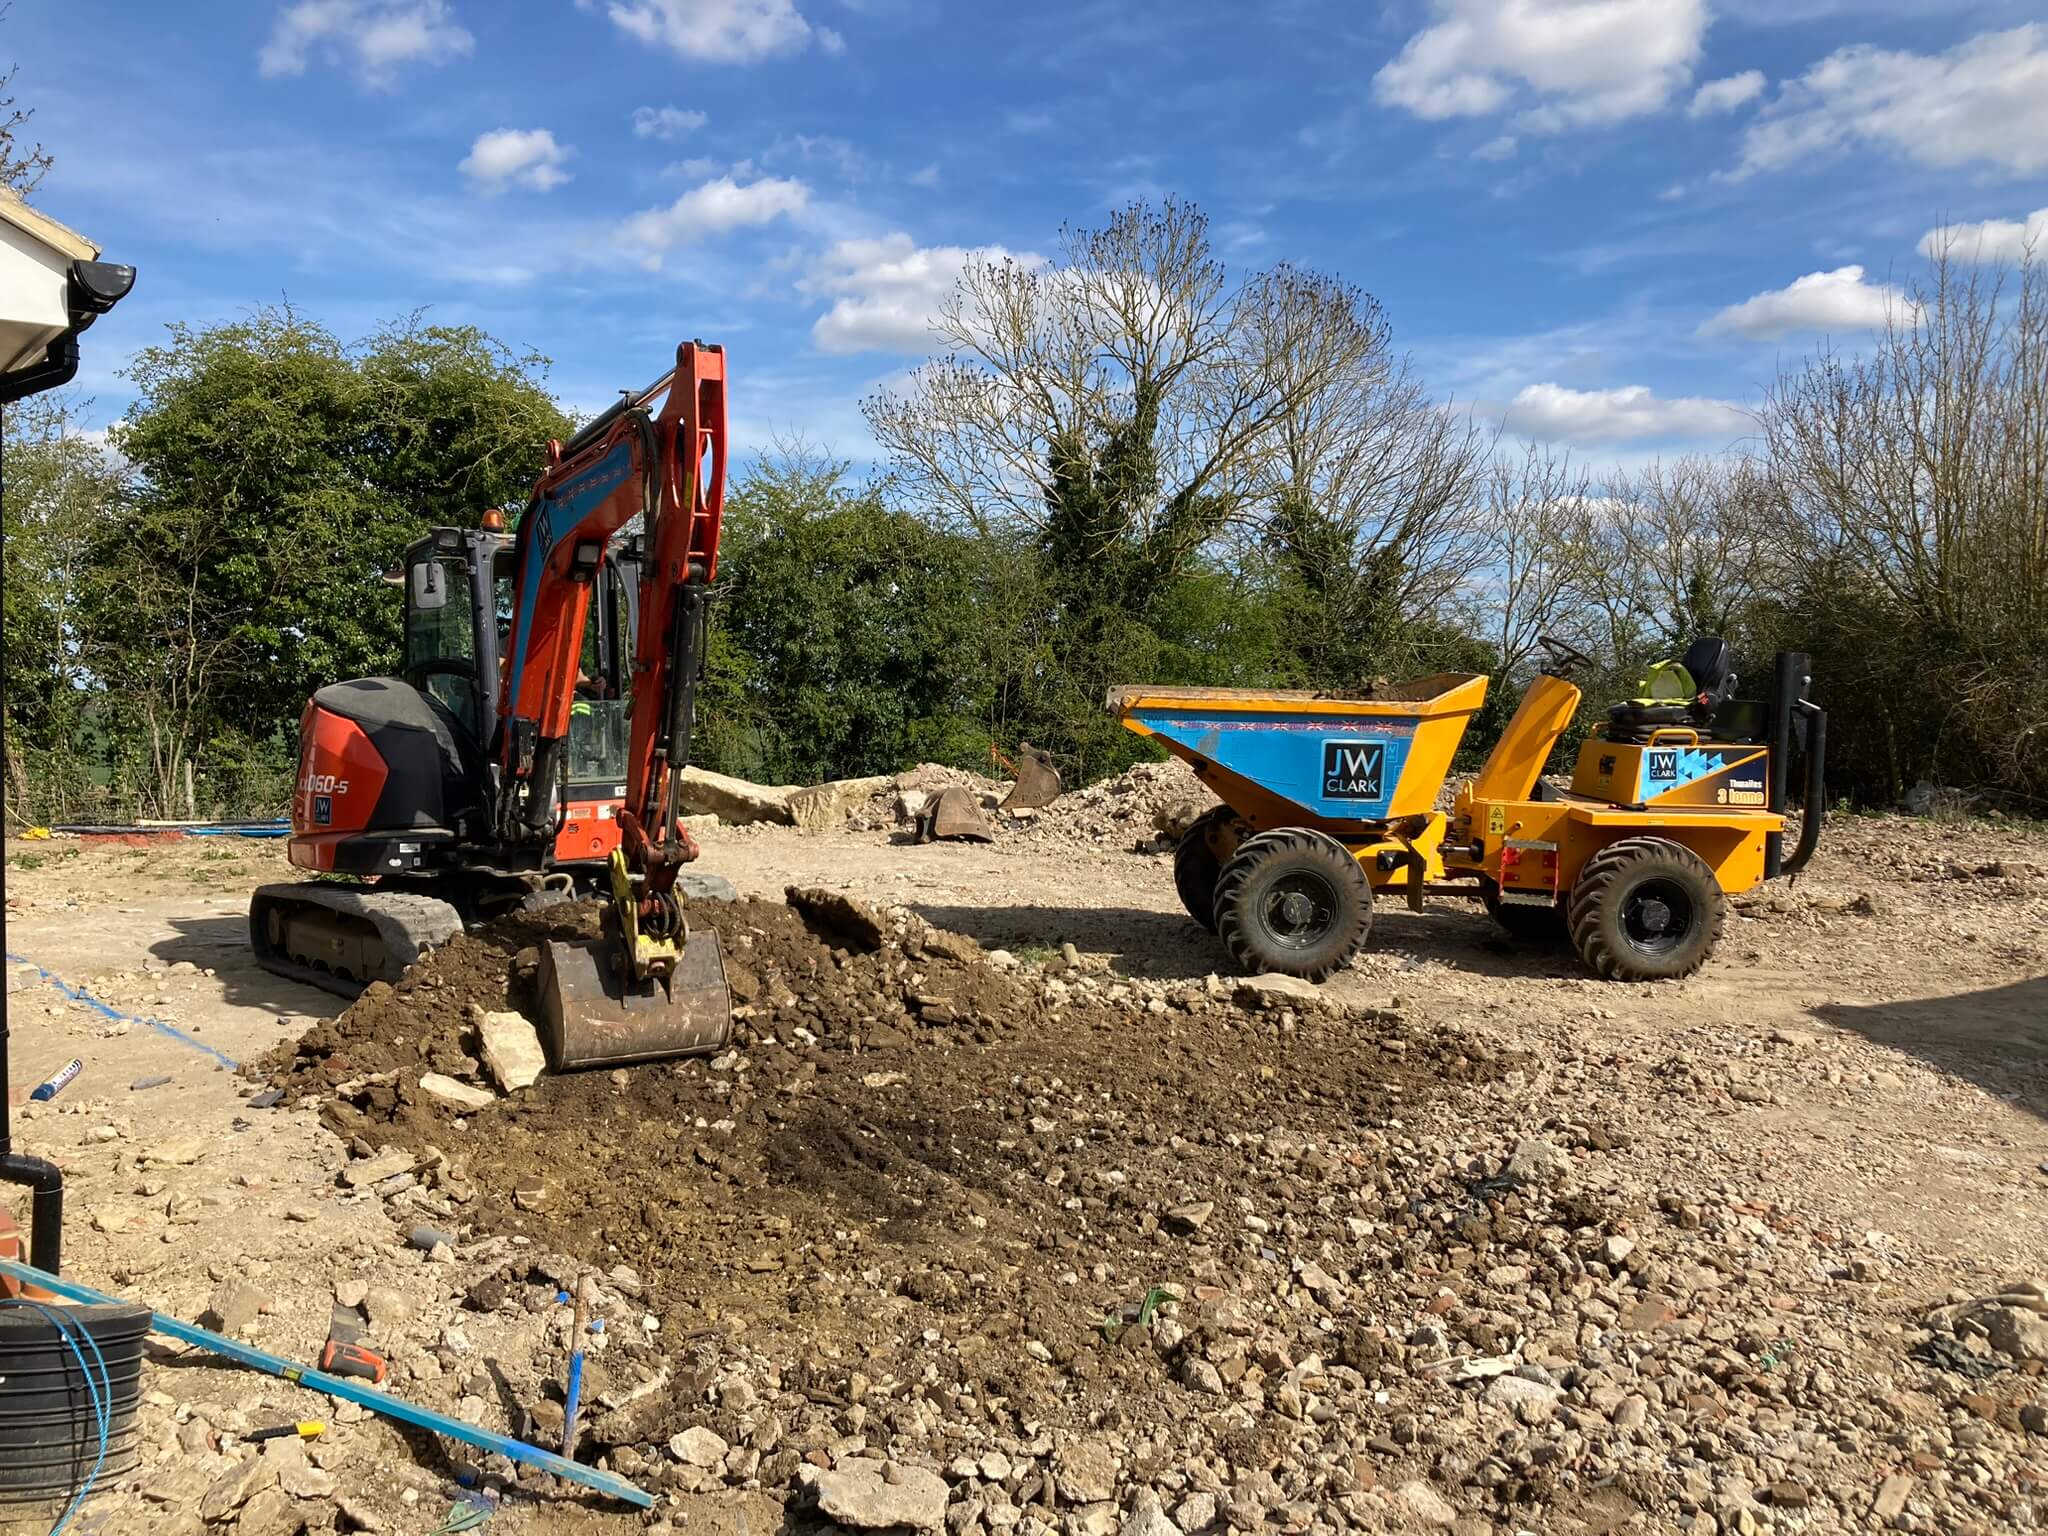

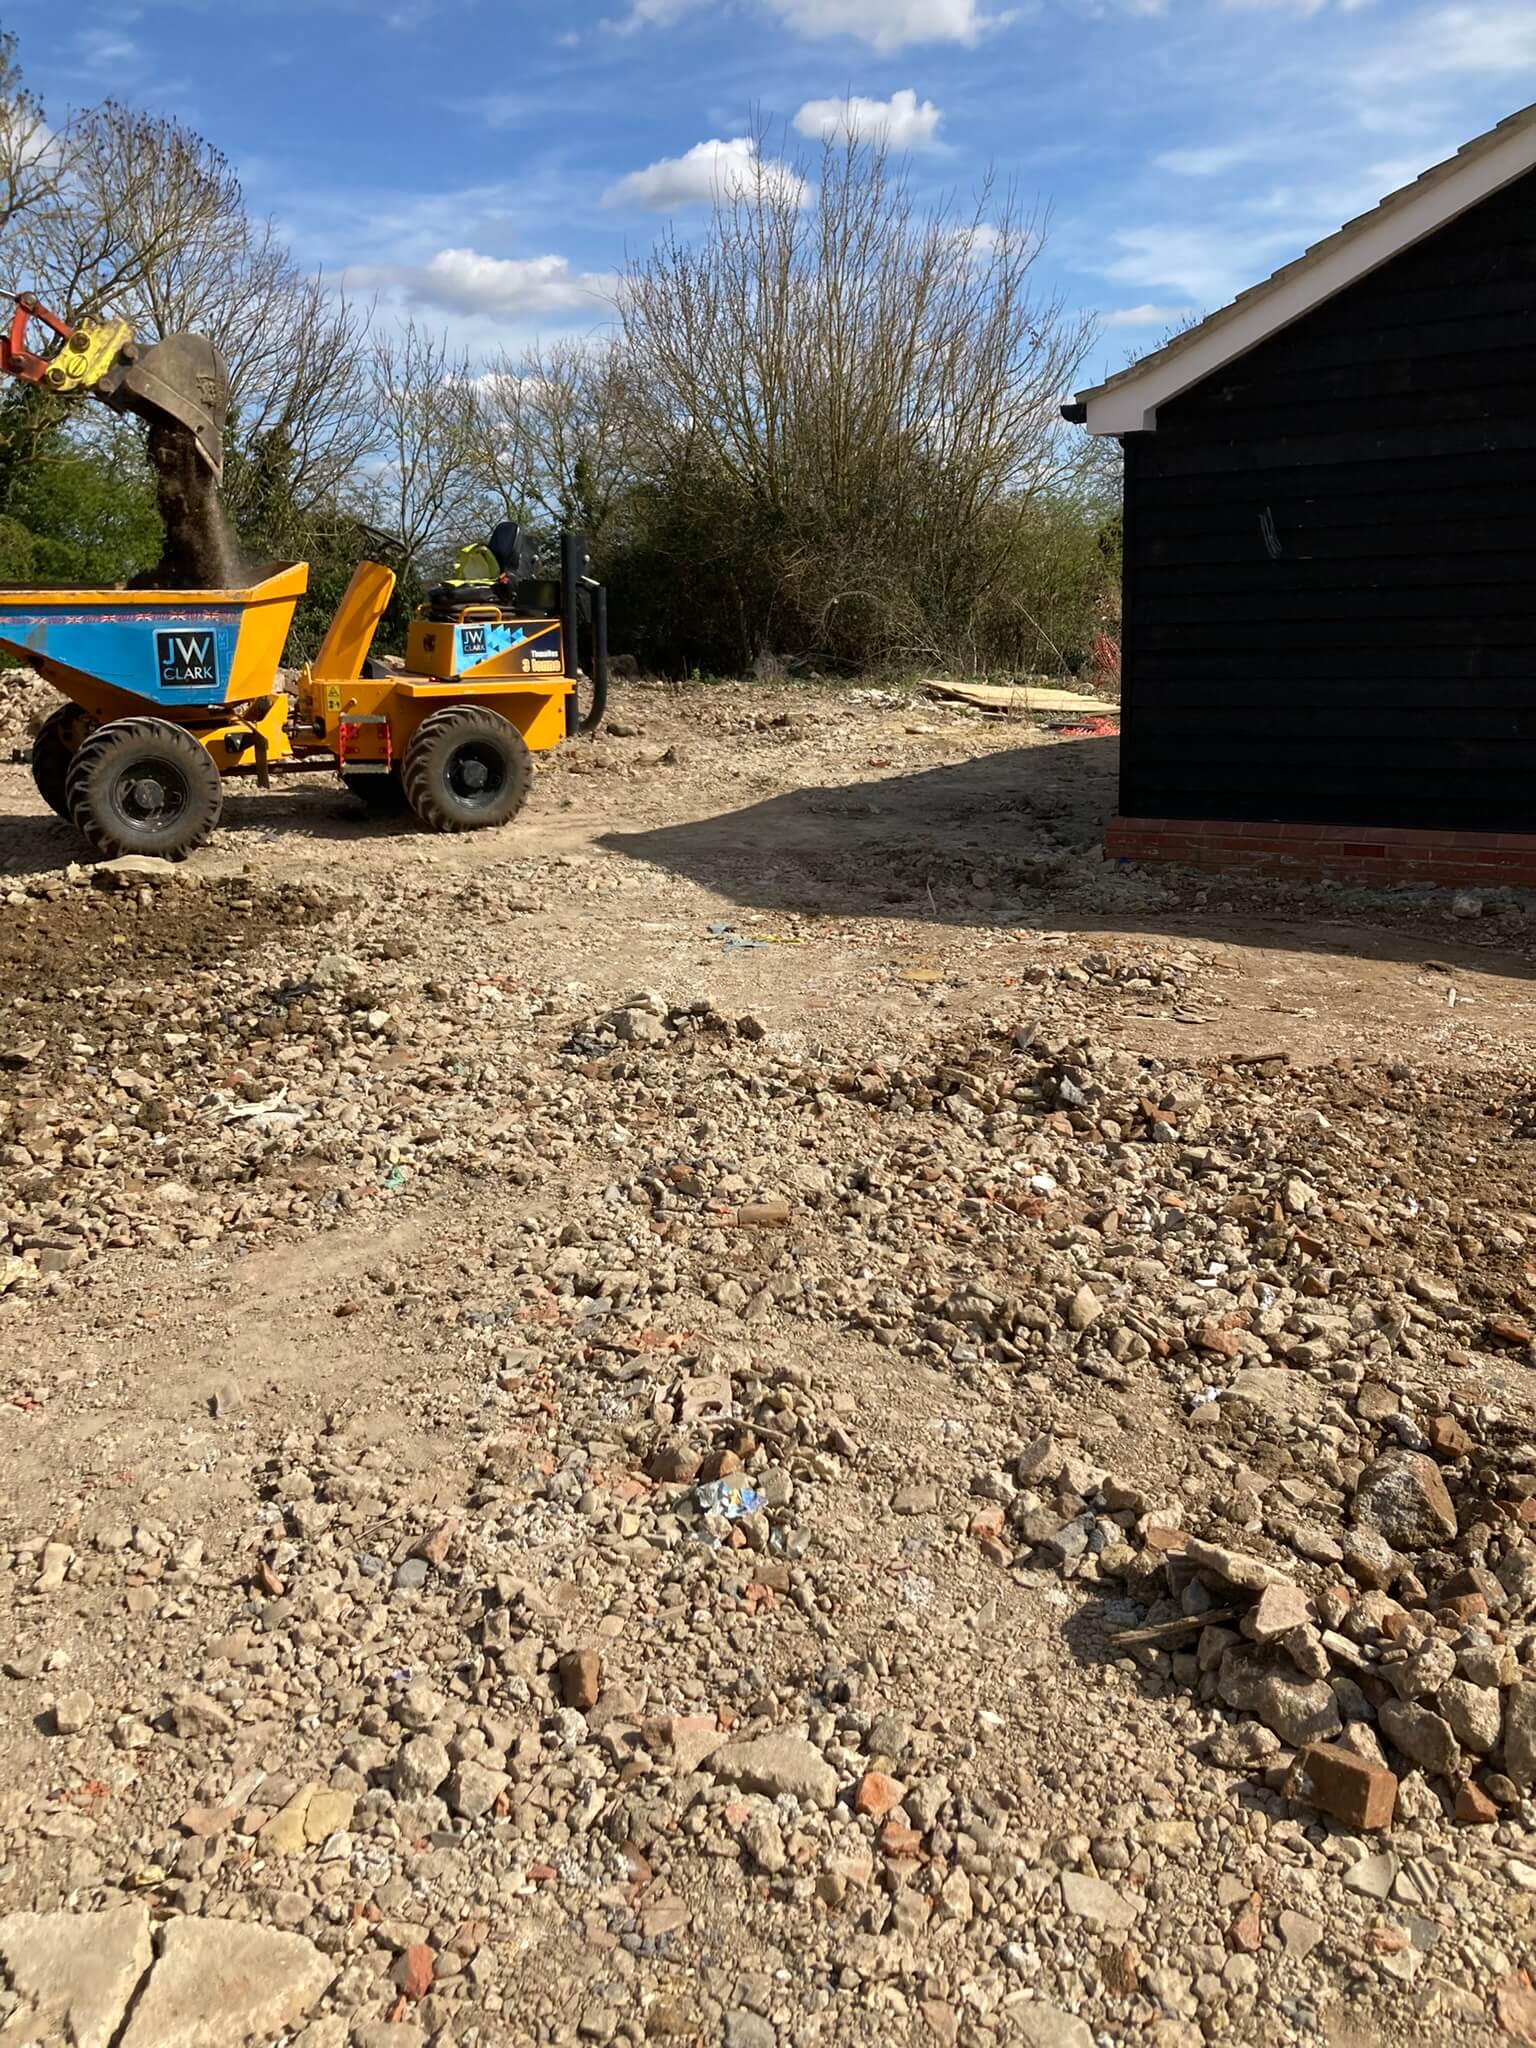


Having done the groundwork for this project, we were delighted to be asked to return to complete the external works including block paving & tarmac.
Our objective was to prepare for paving from around the two barn conversions, up towards the Highway and then to finish off with resurfacing the existing vehicle crossover.
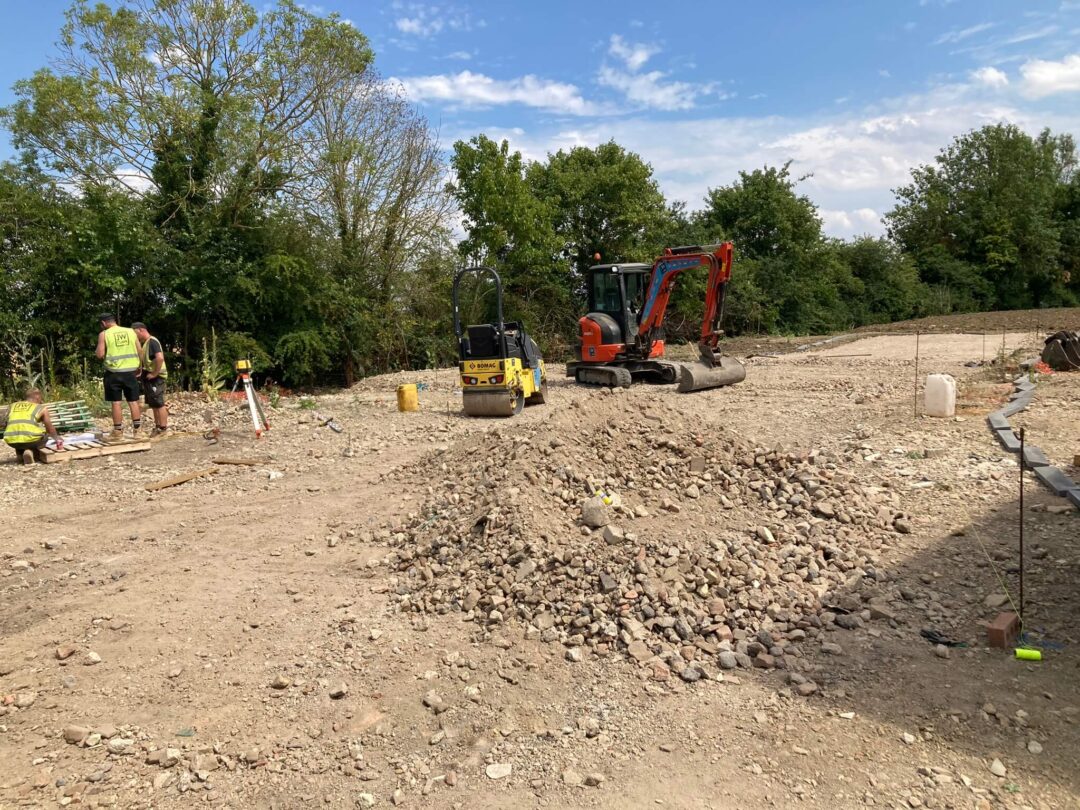
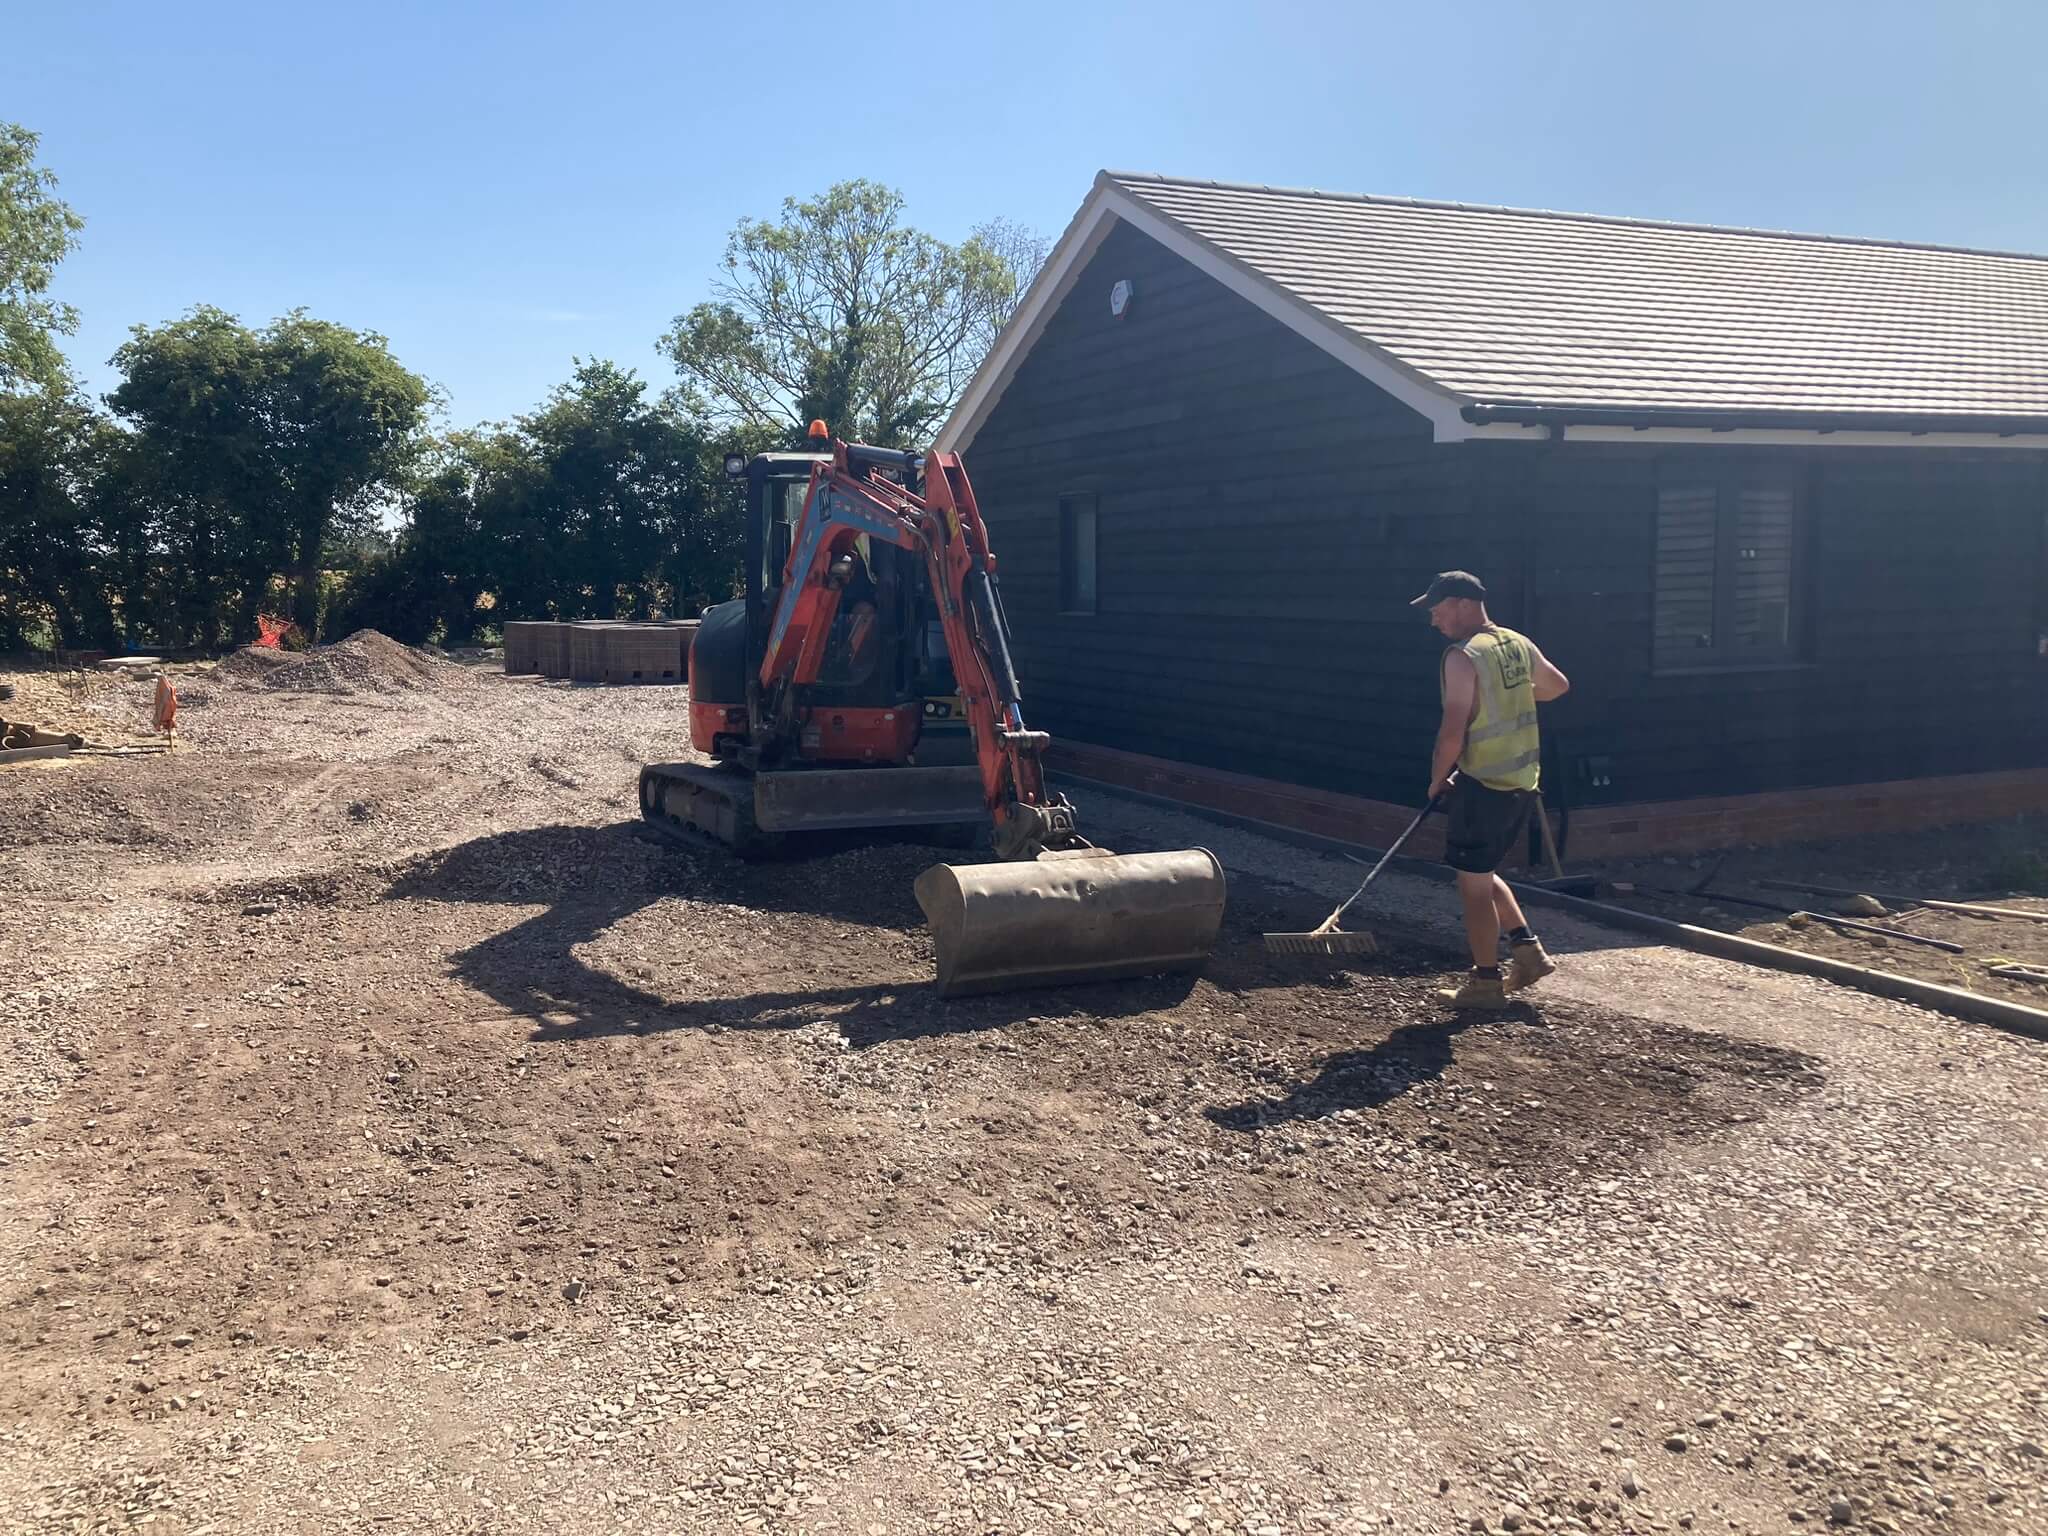
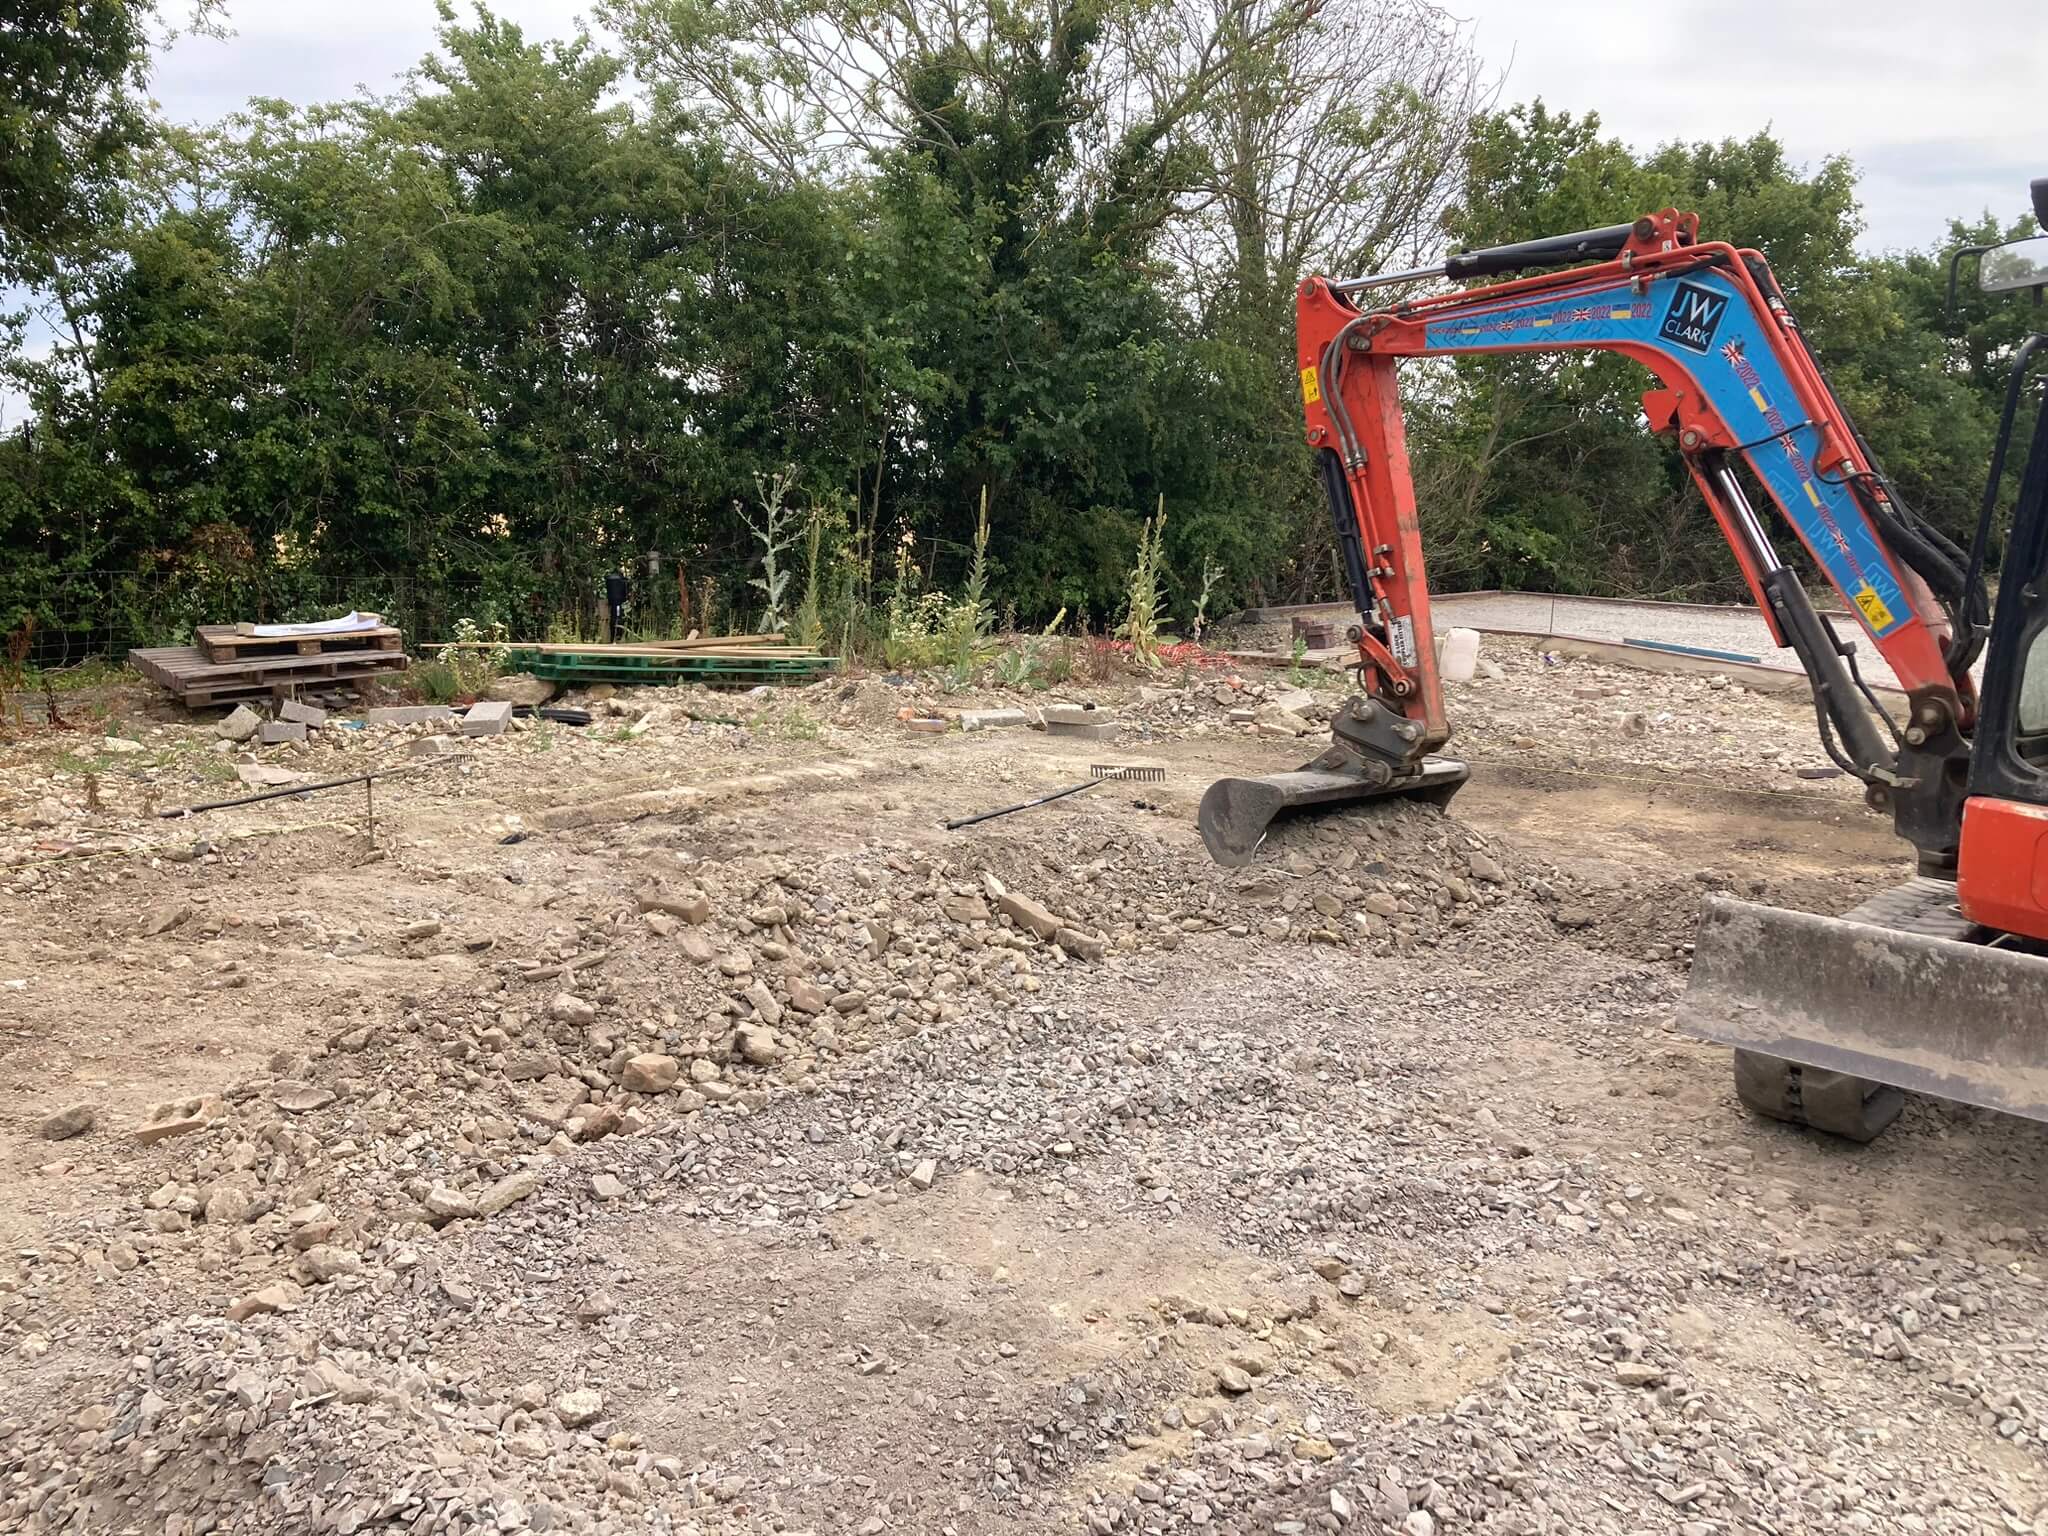
Having done the groundwork for the two new barns (click here for that case study) we were familiar with the site, and we’d previously left a lot of the levels close to where they had to be.
Our customer had good drawings showing exactly where different parts of the paving would start and finish.
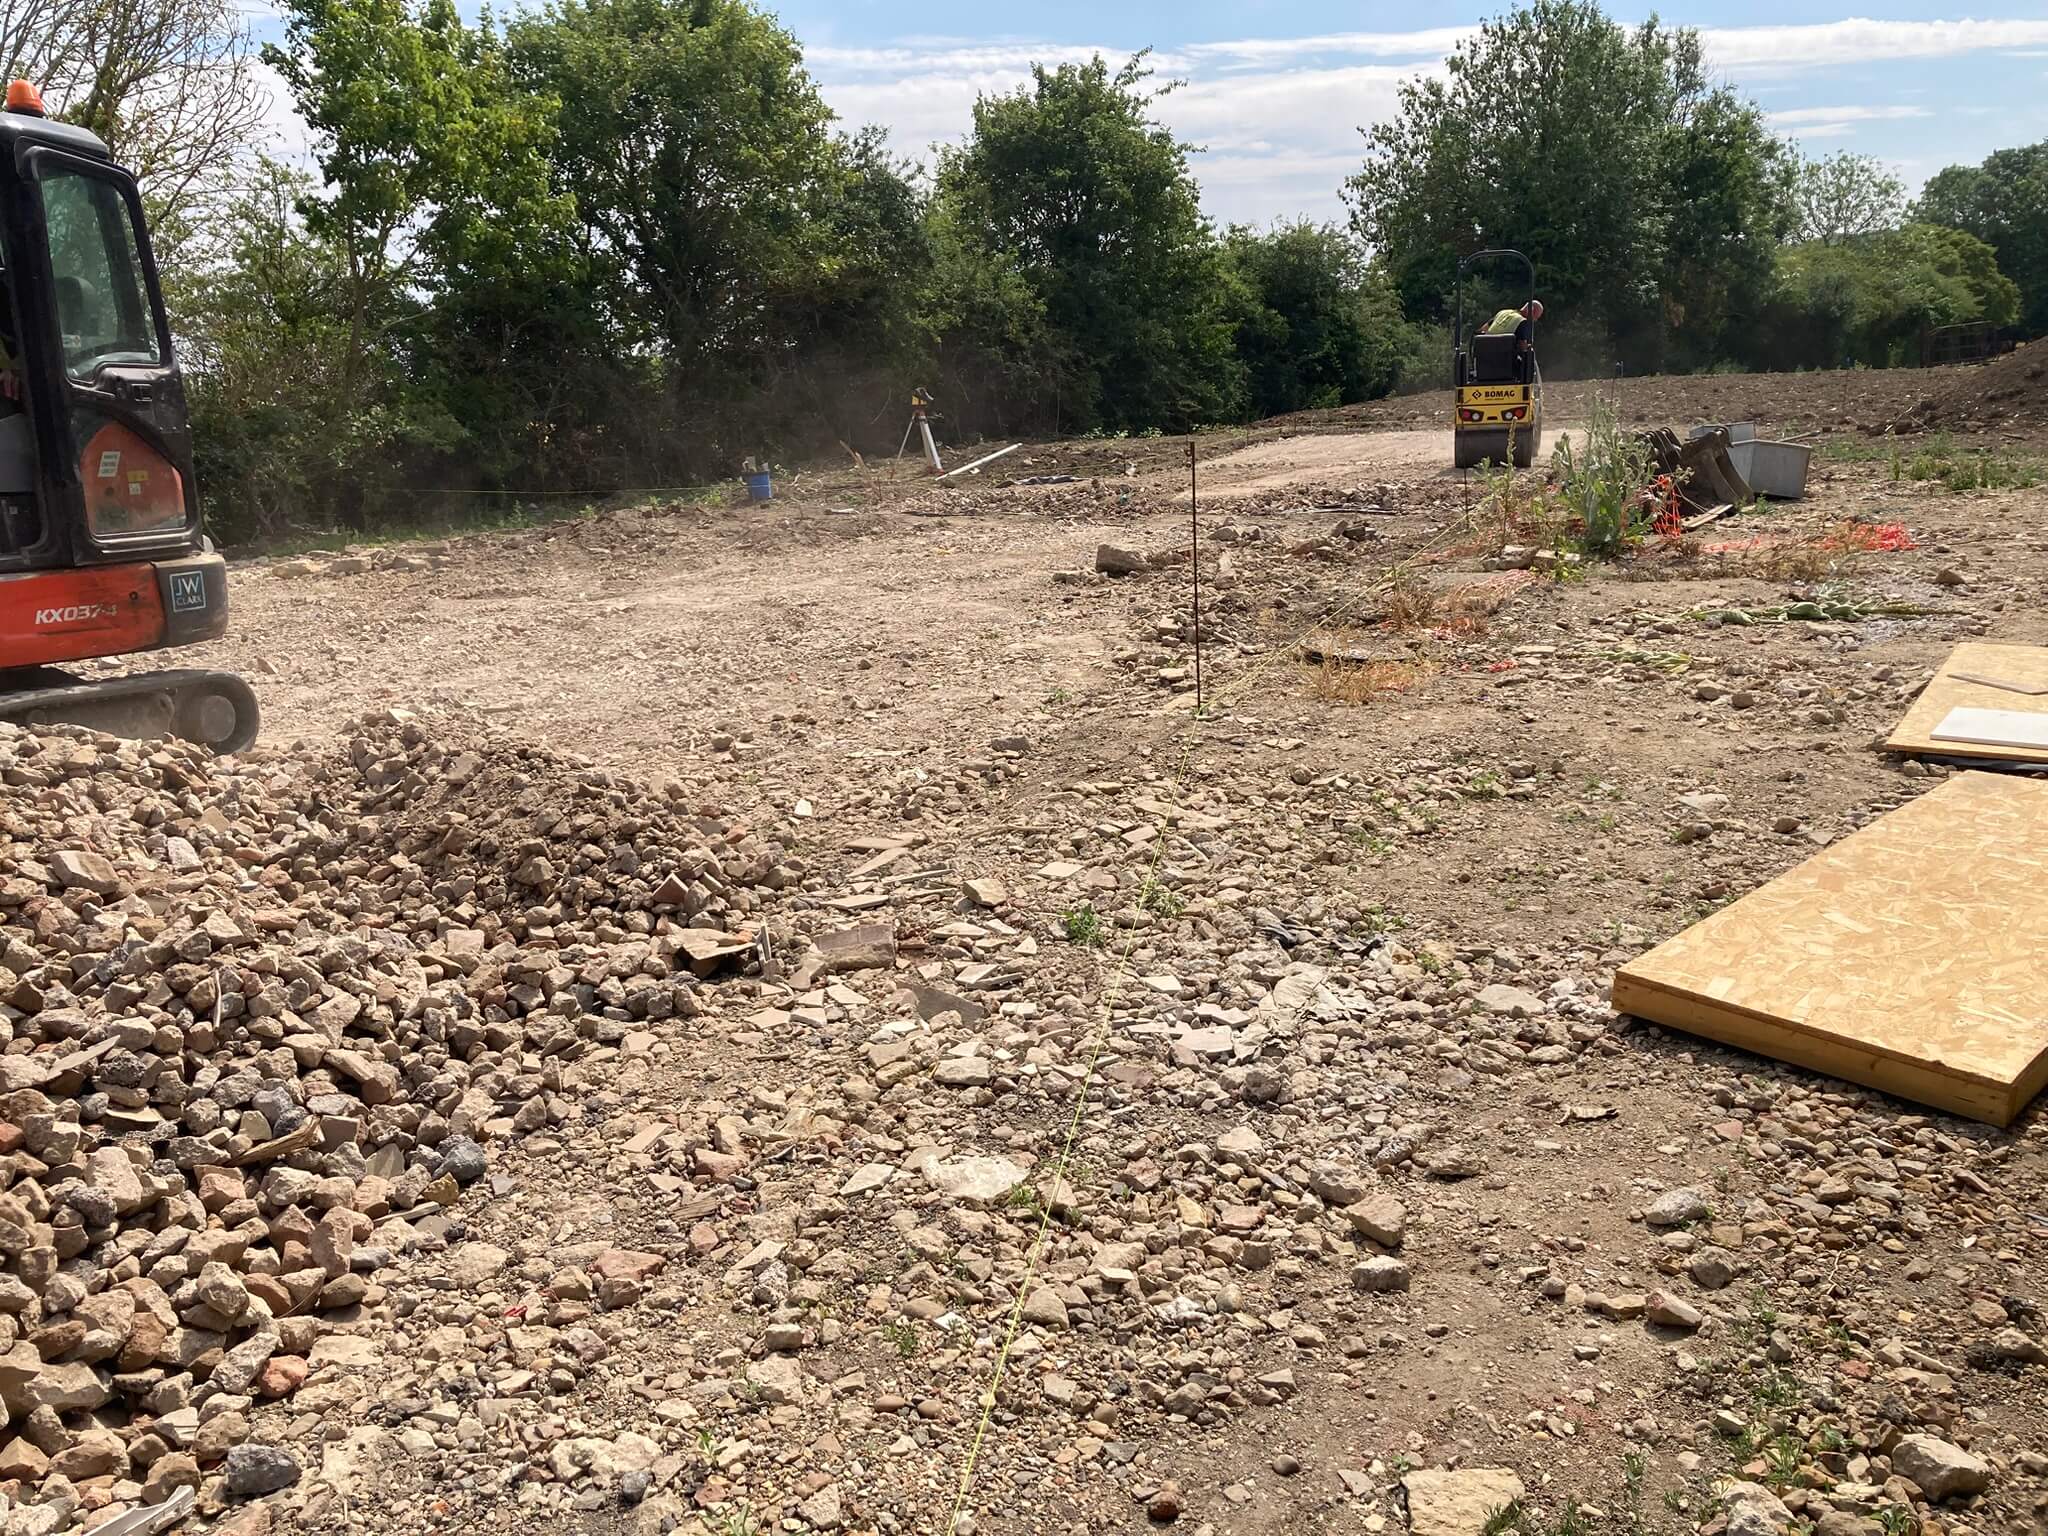
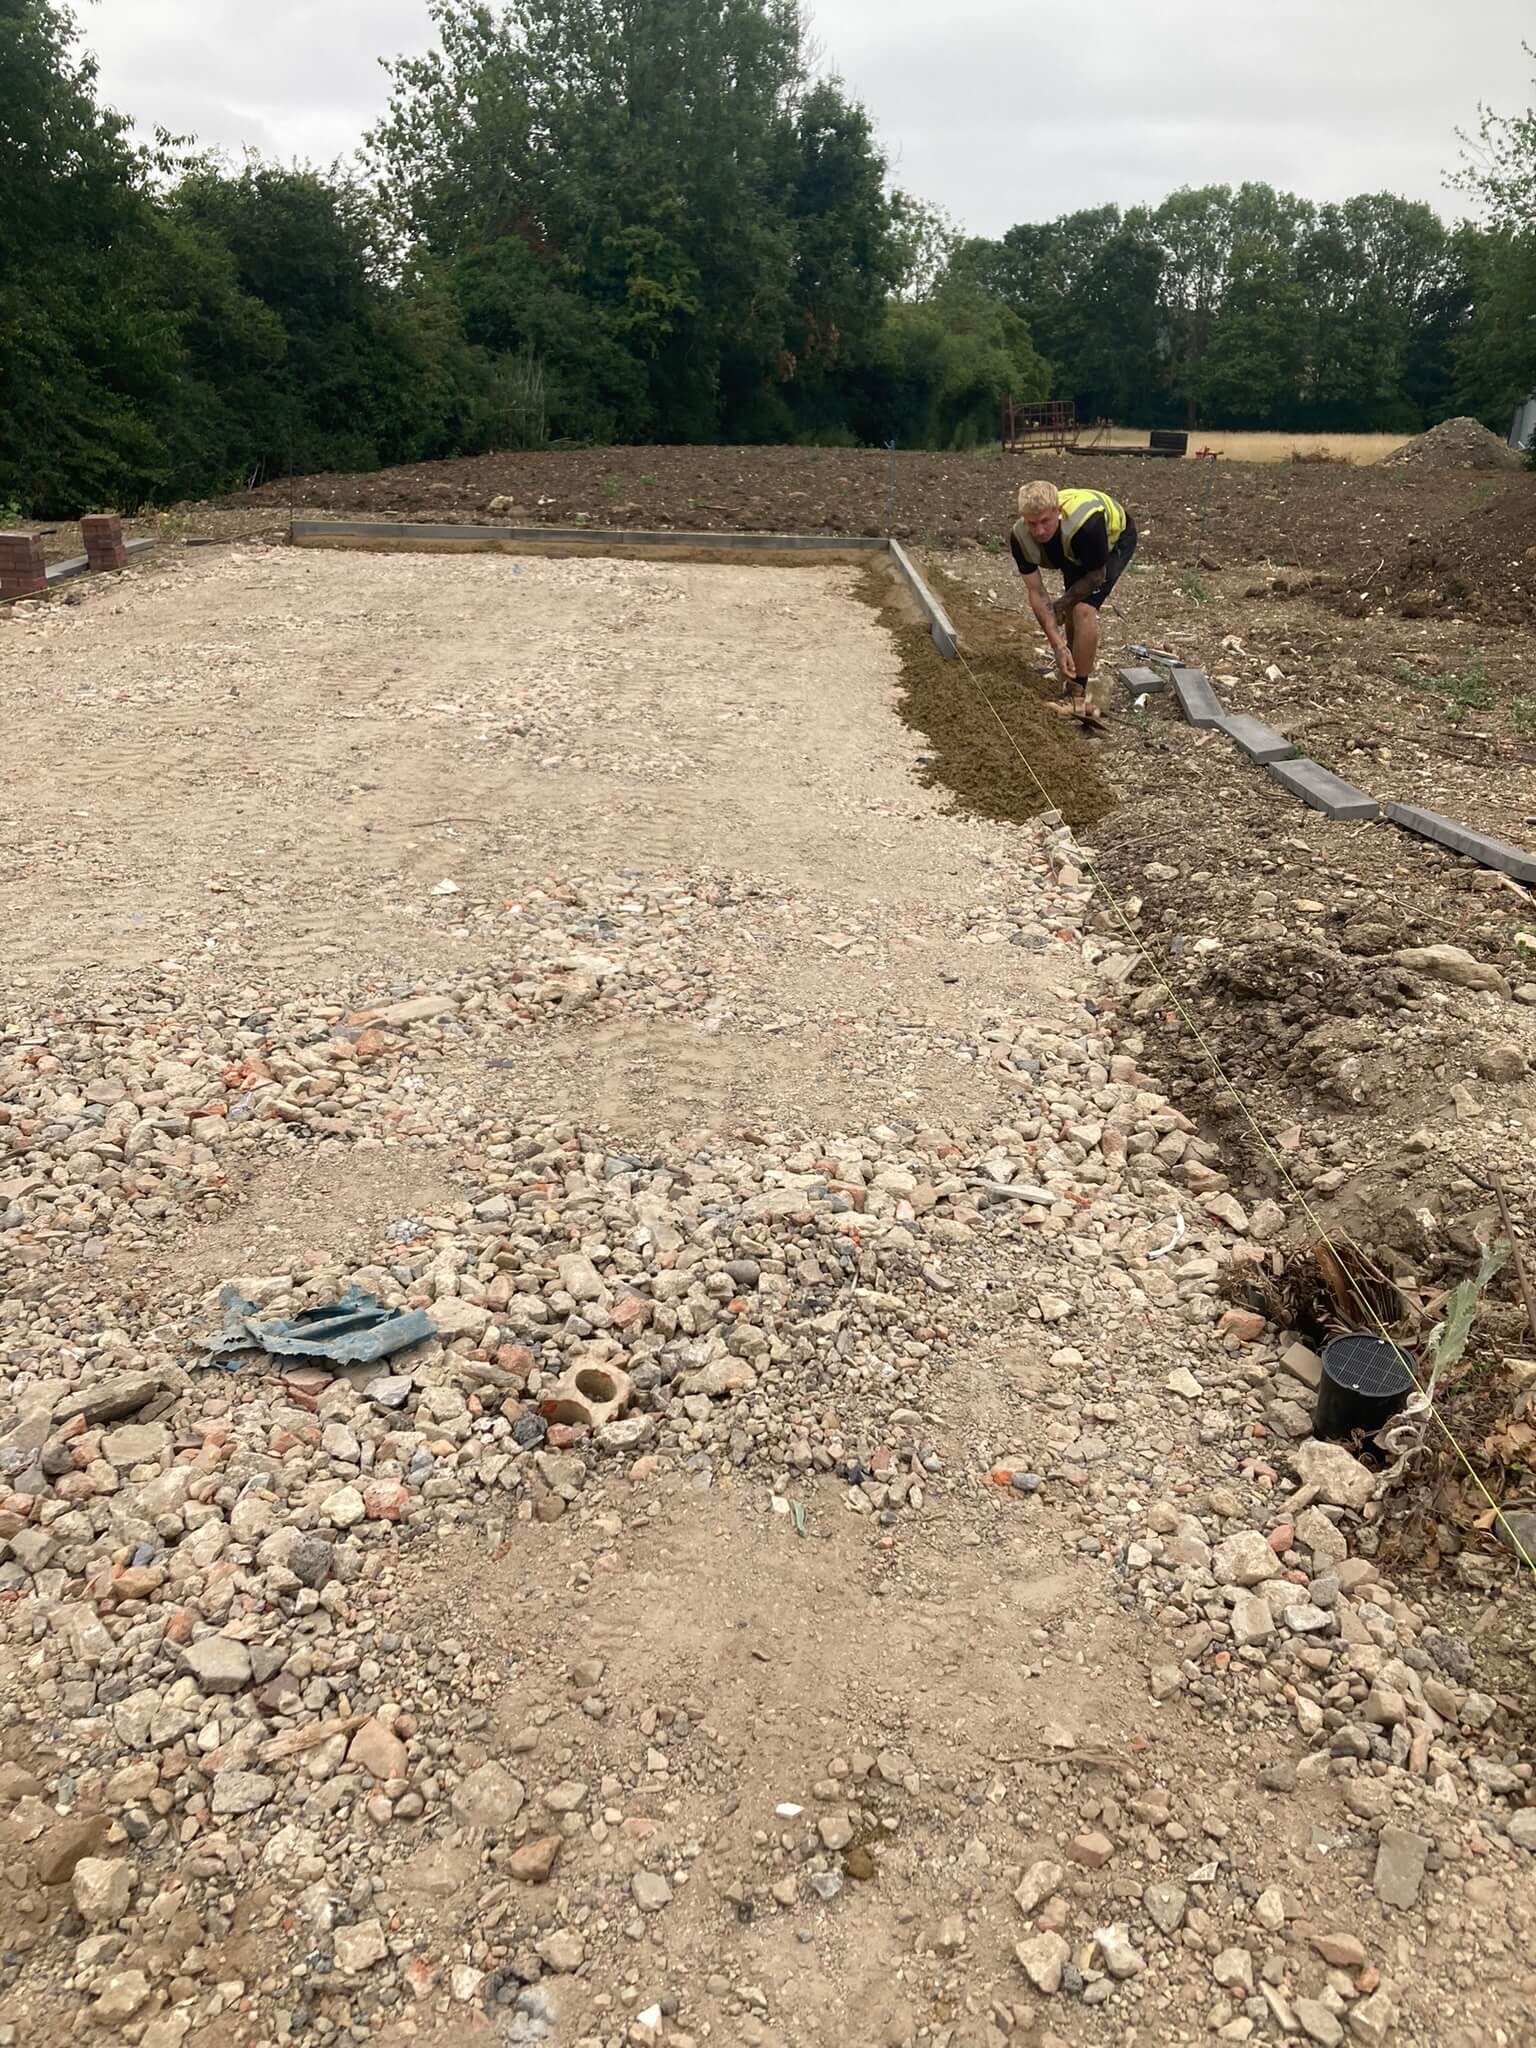
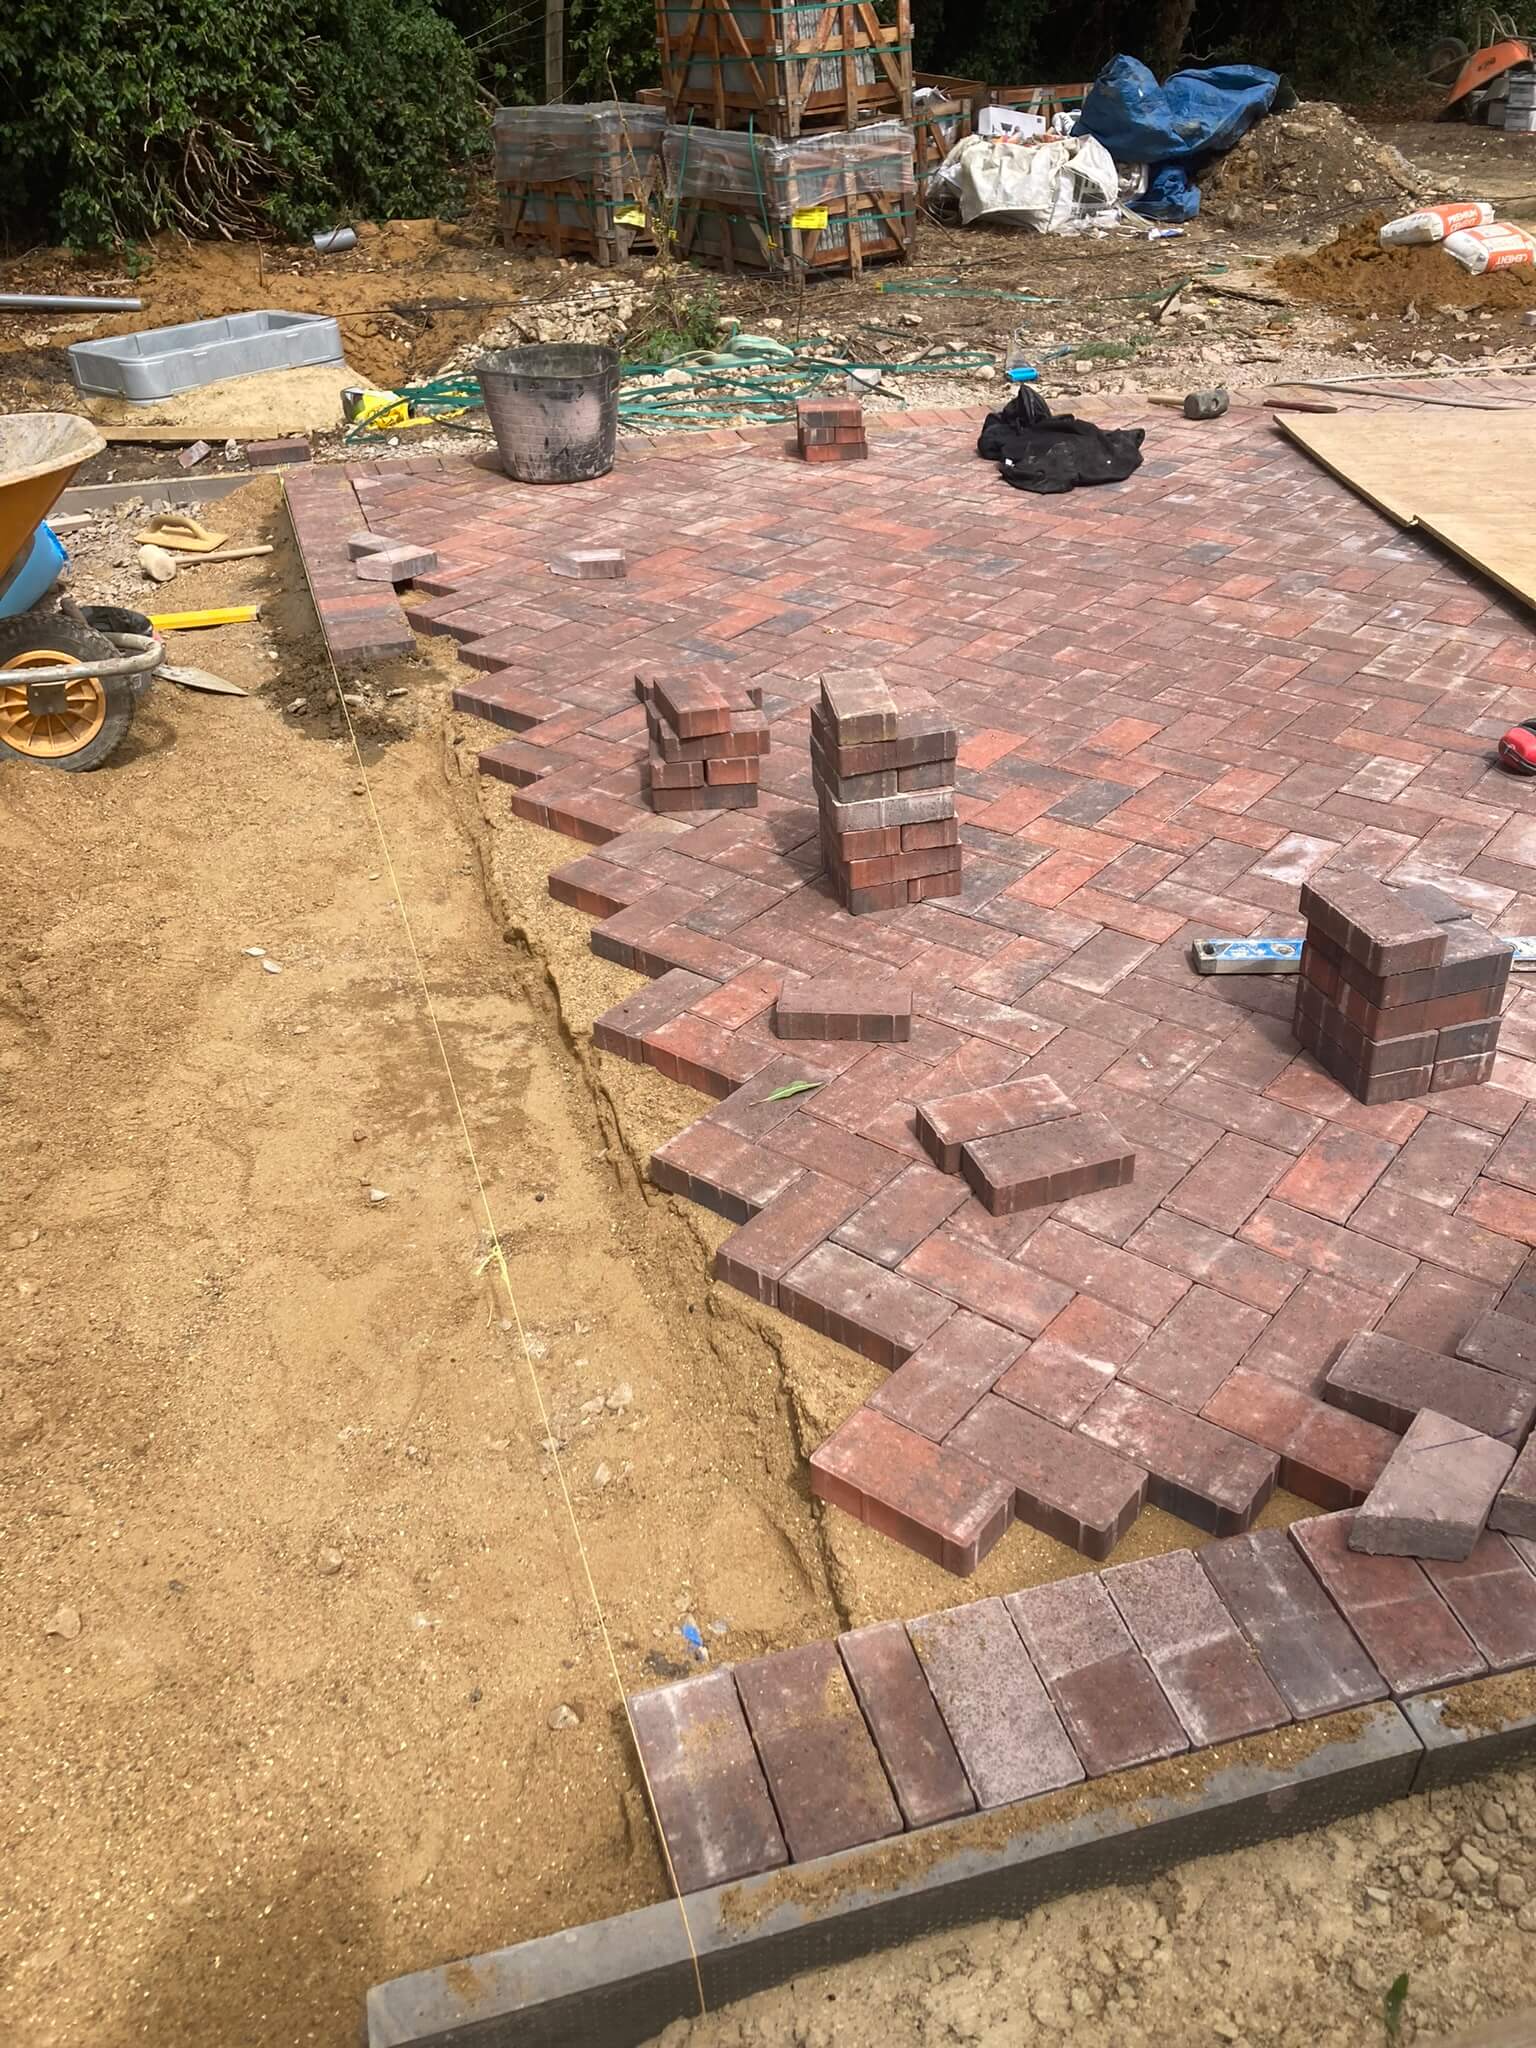
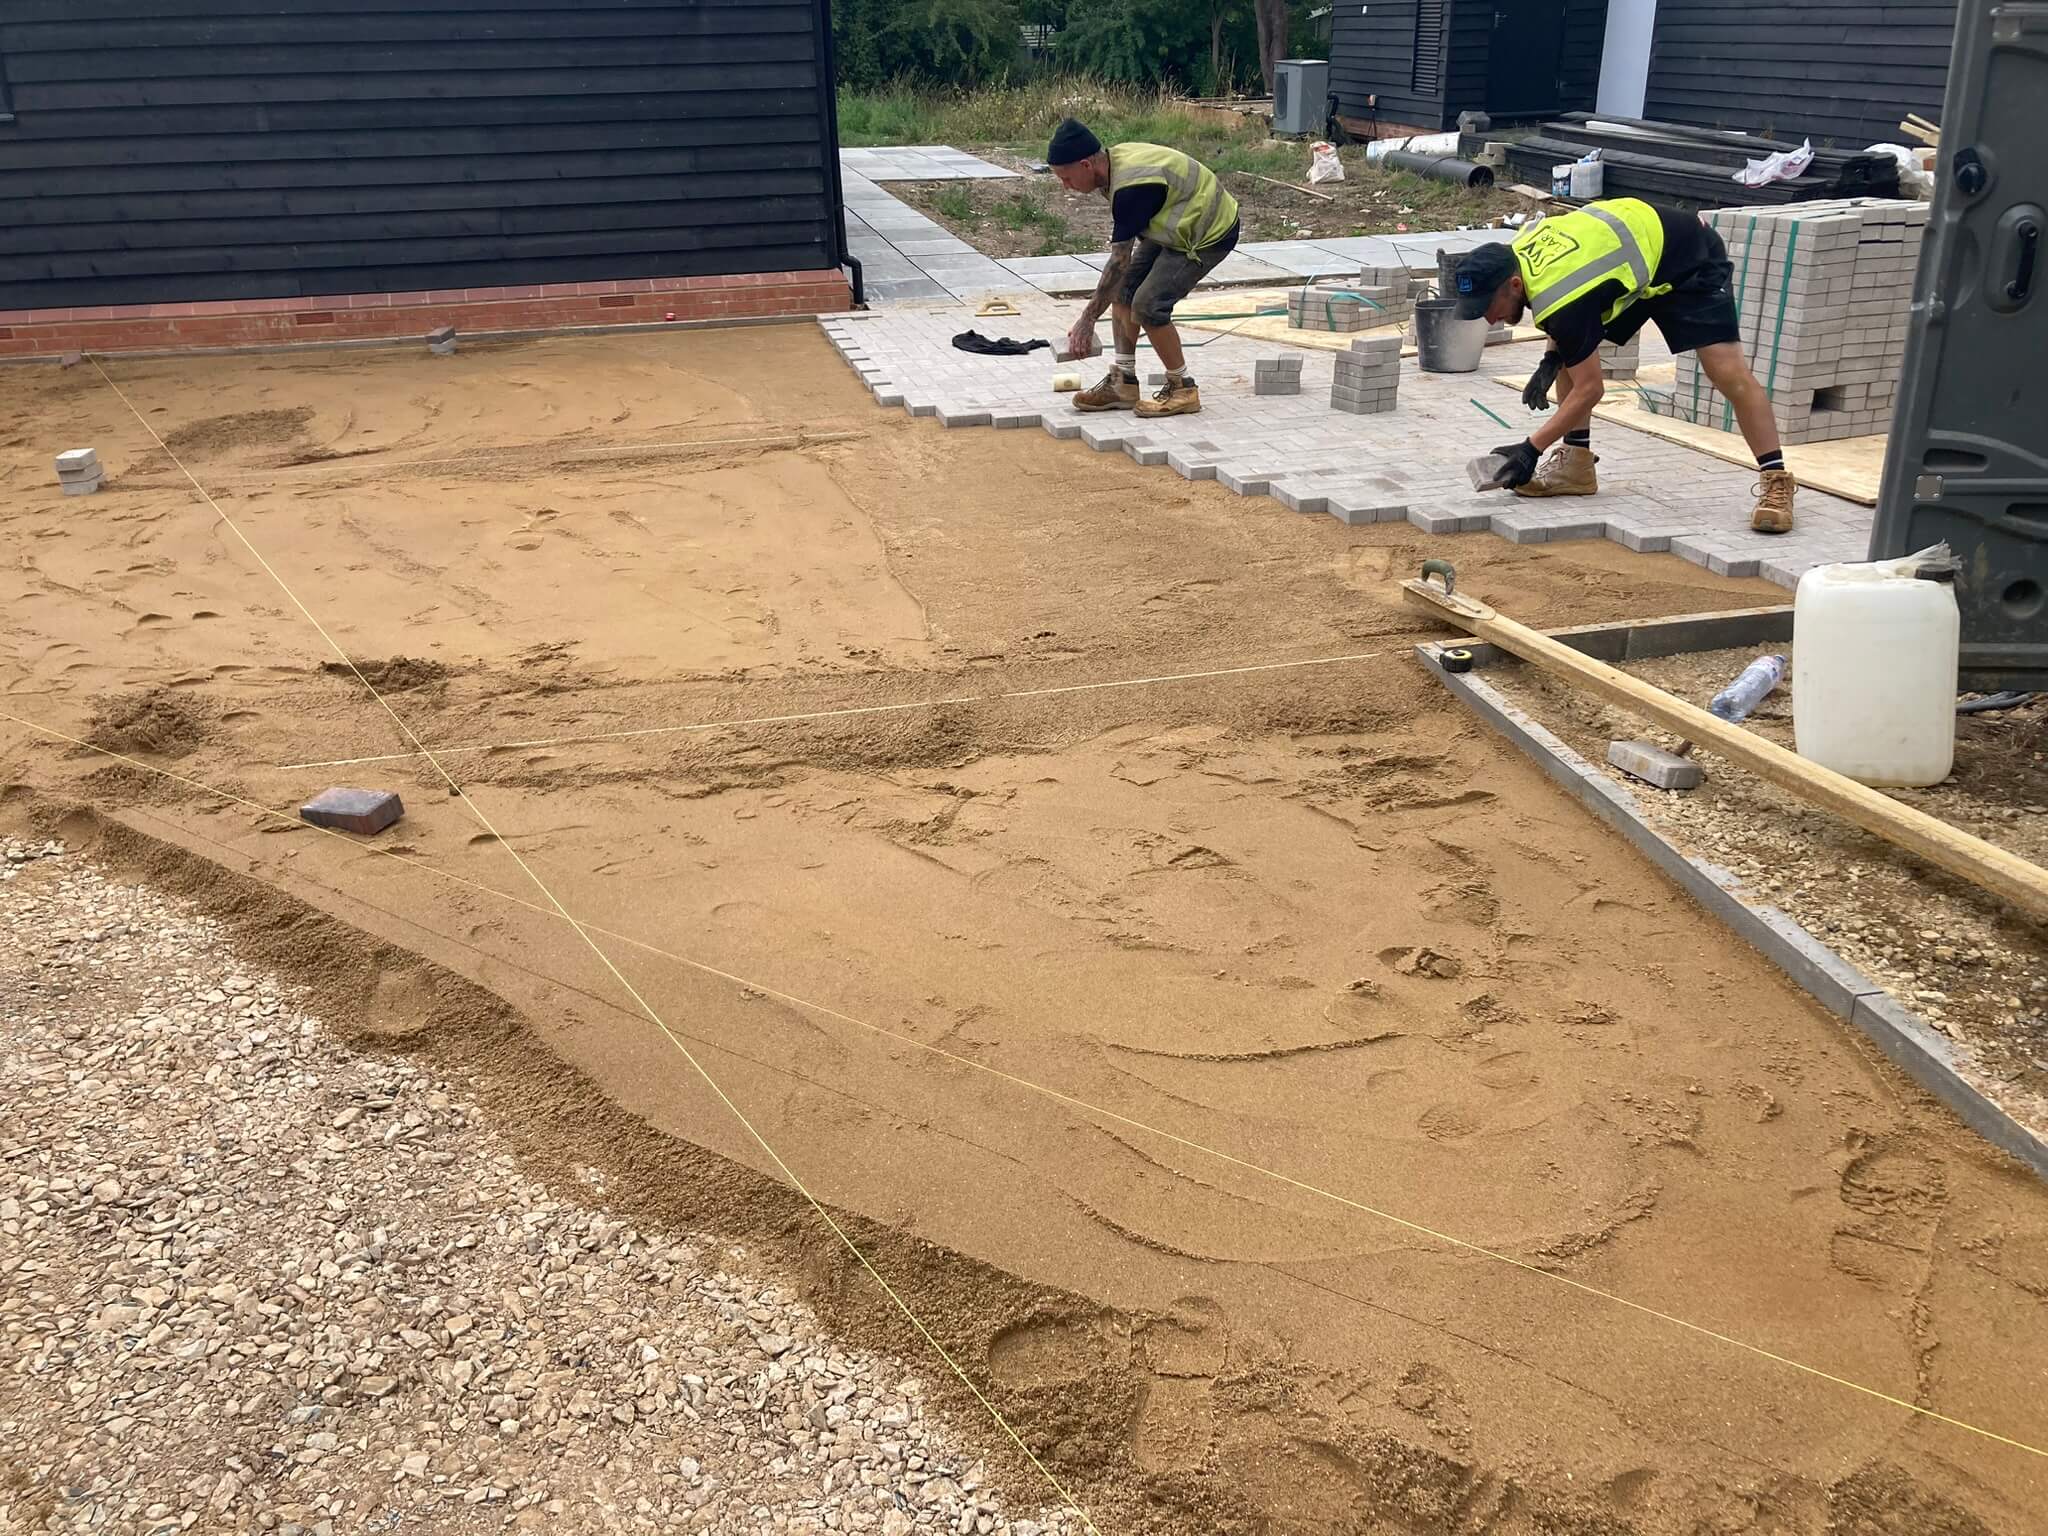
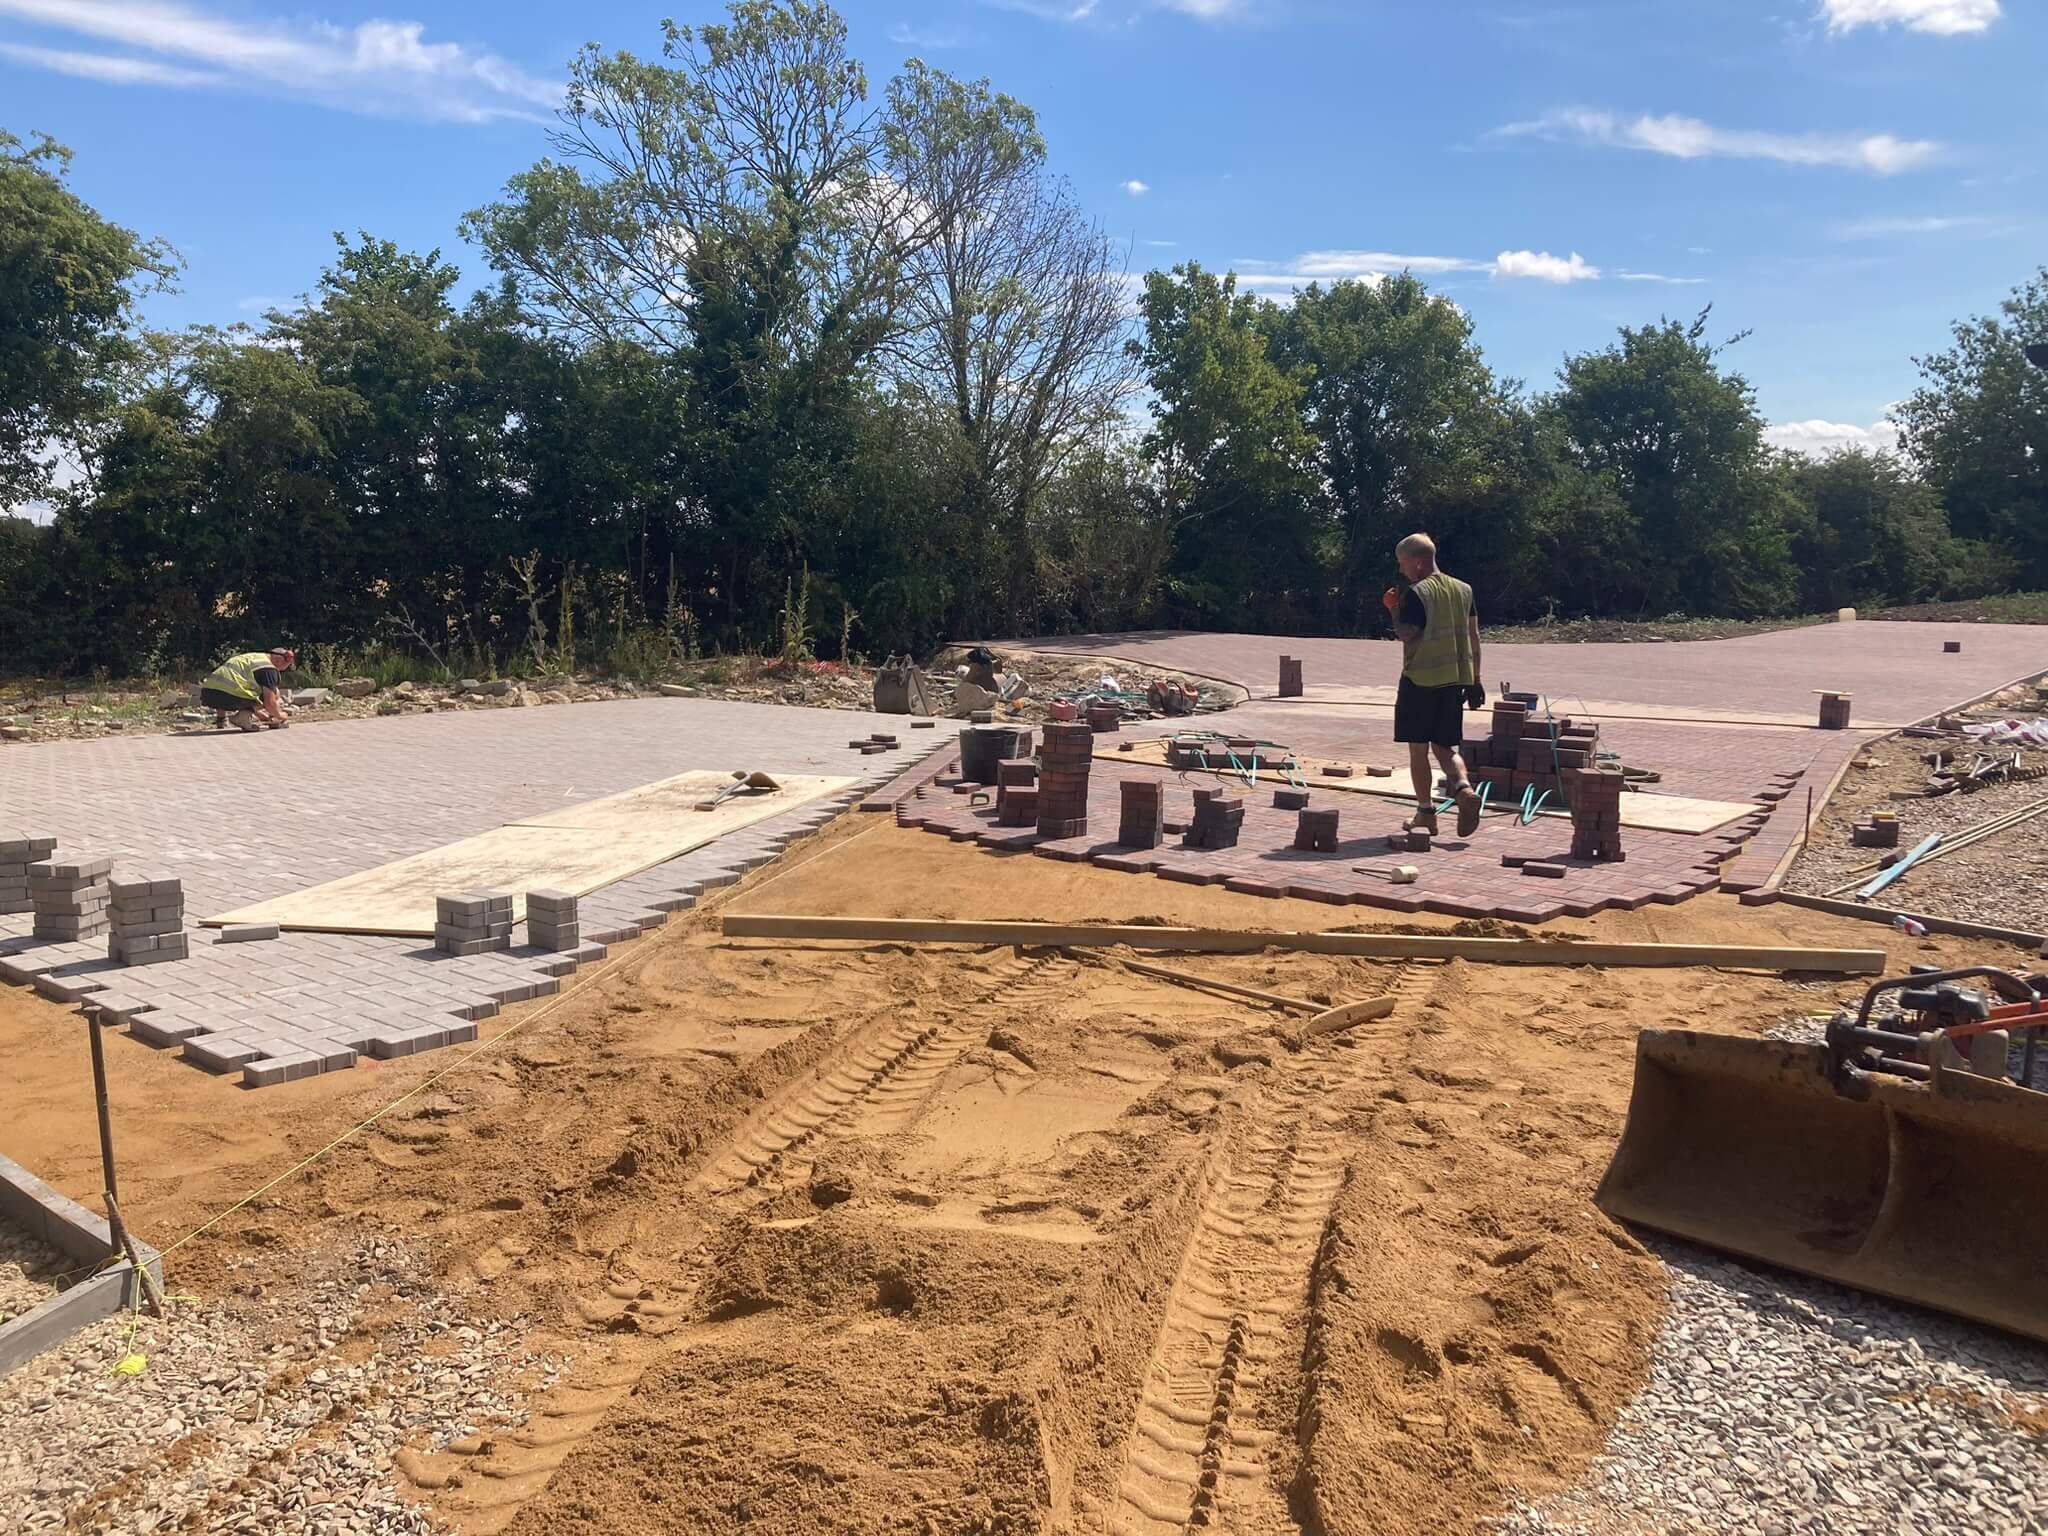
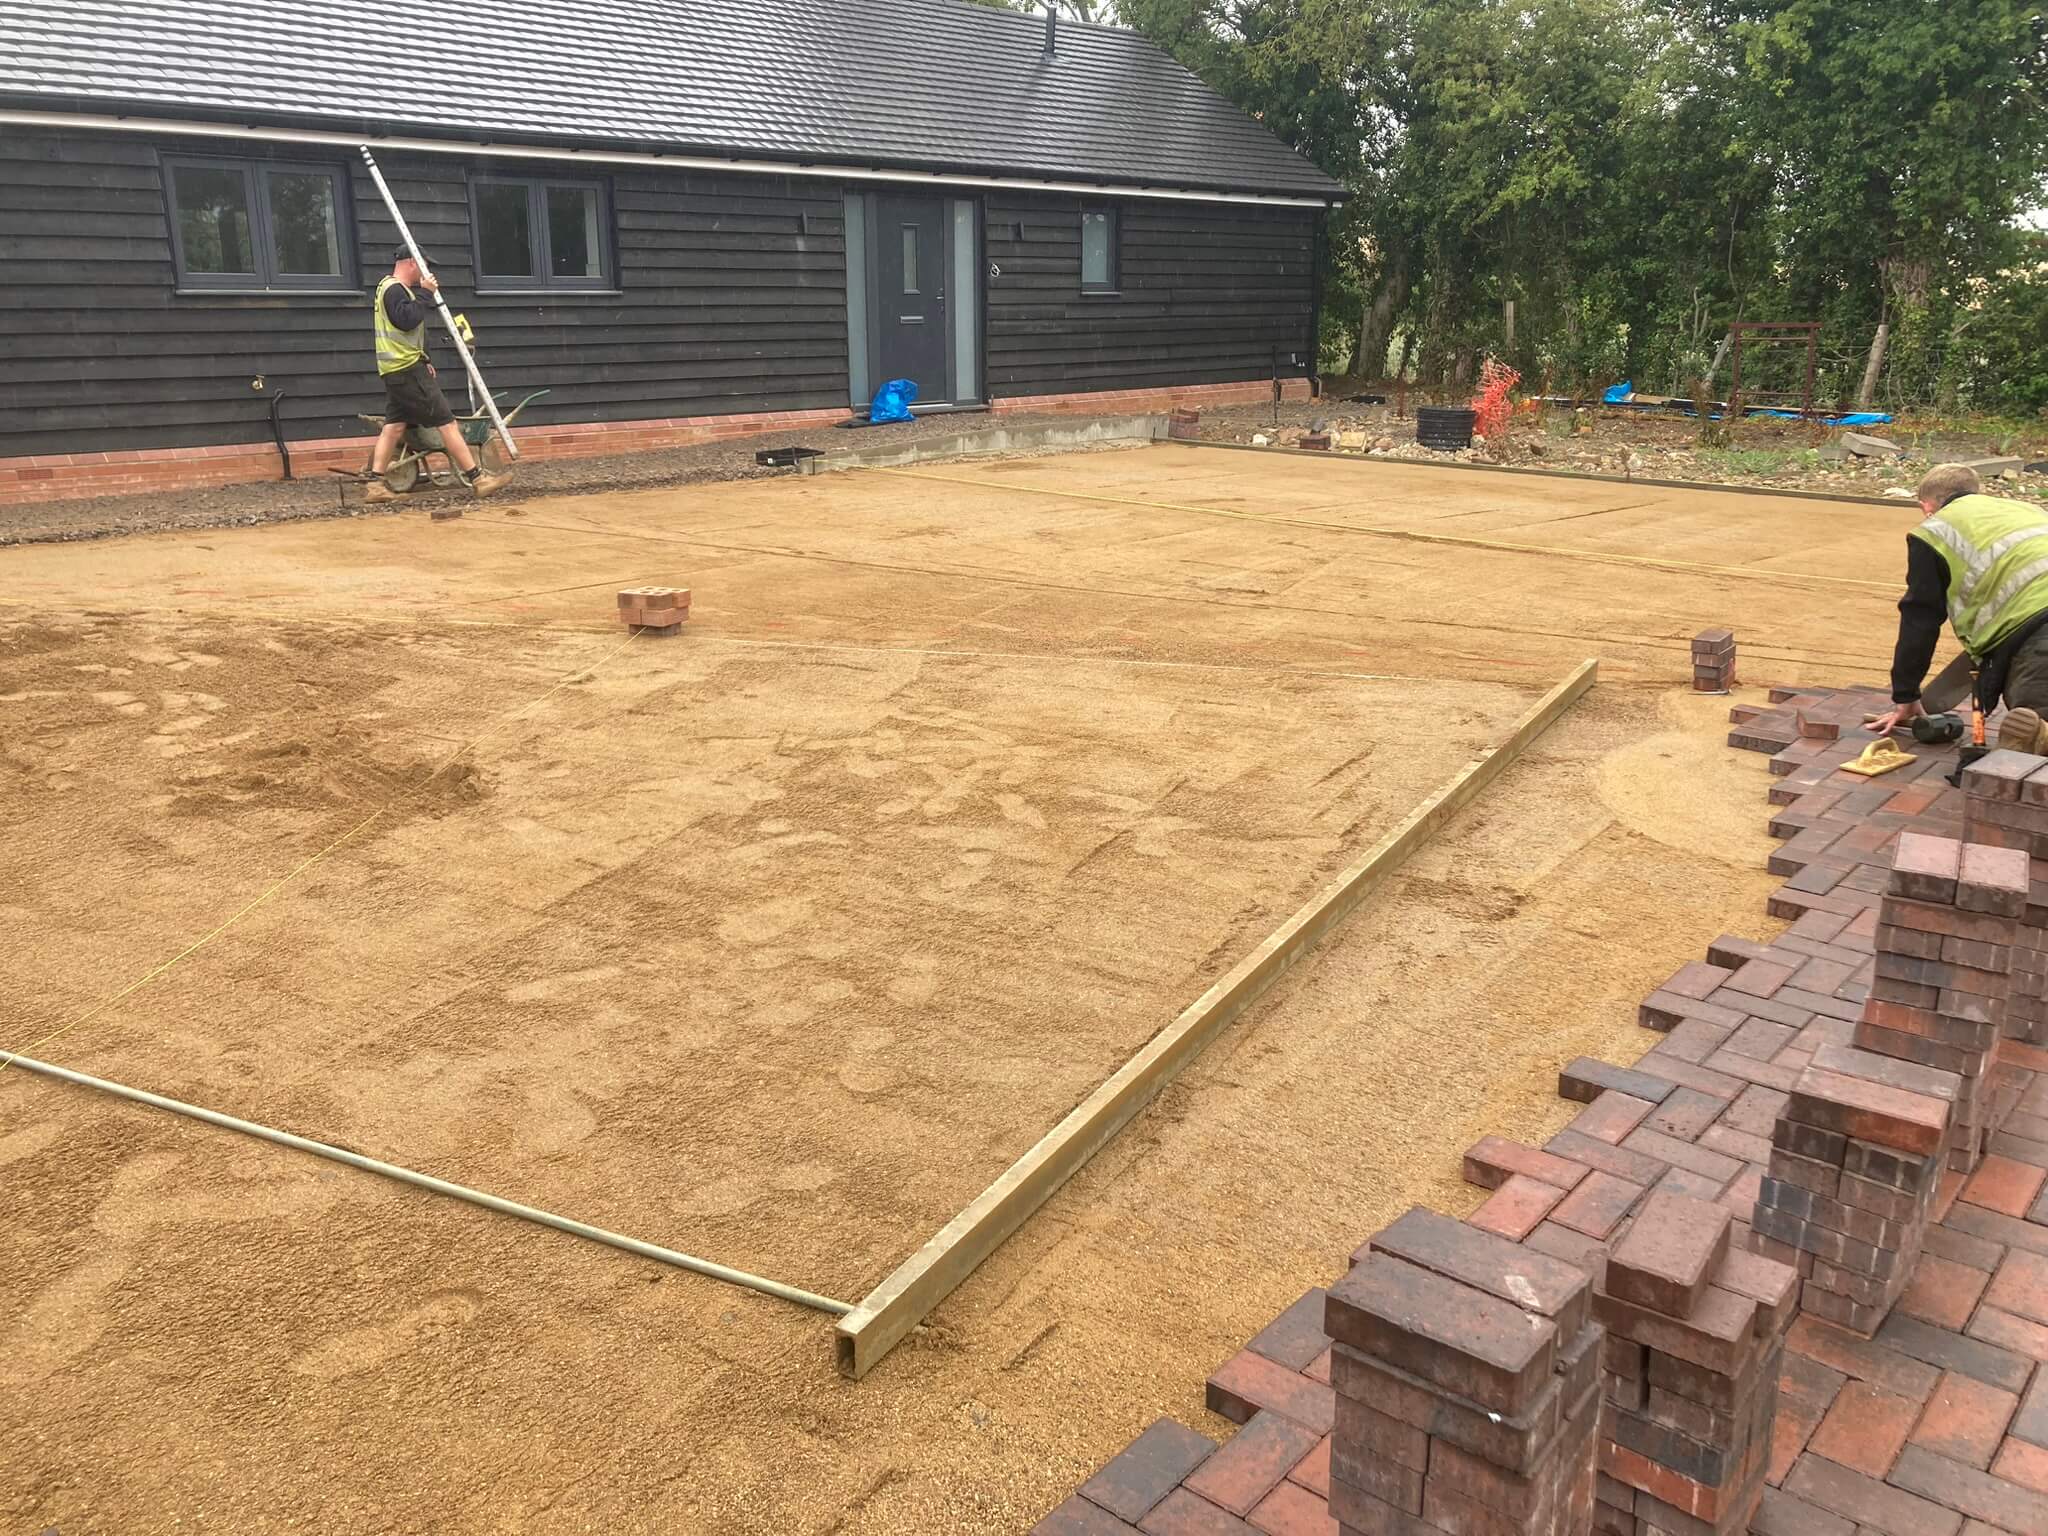
We started by working out levels so that paving fell in different directions, to help with drainage and avoid puddling in the paving. We were generally into a layer of hardcore having ascertained levels, but we still laid a geotextile membrane, before bringing in more 6F2 recycled hardcore, and the Type 1 Granite MOT. The majority of the paving was edged with standard ‘natural’ edging kerbs.
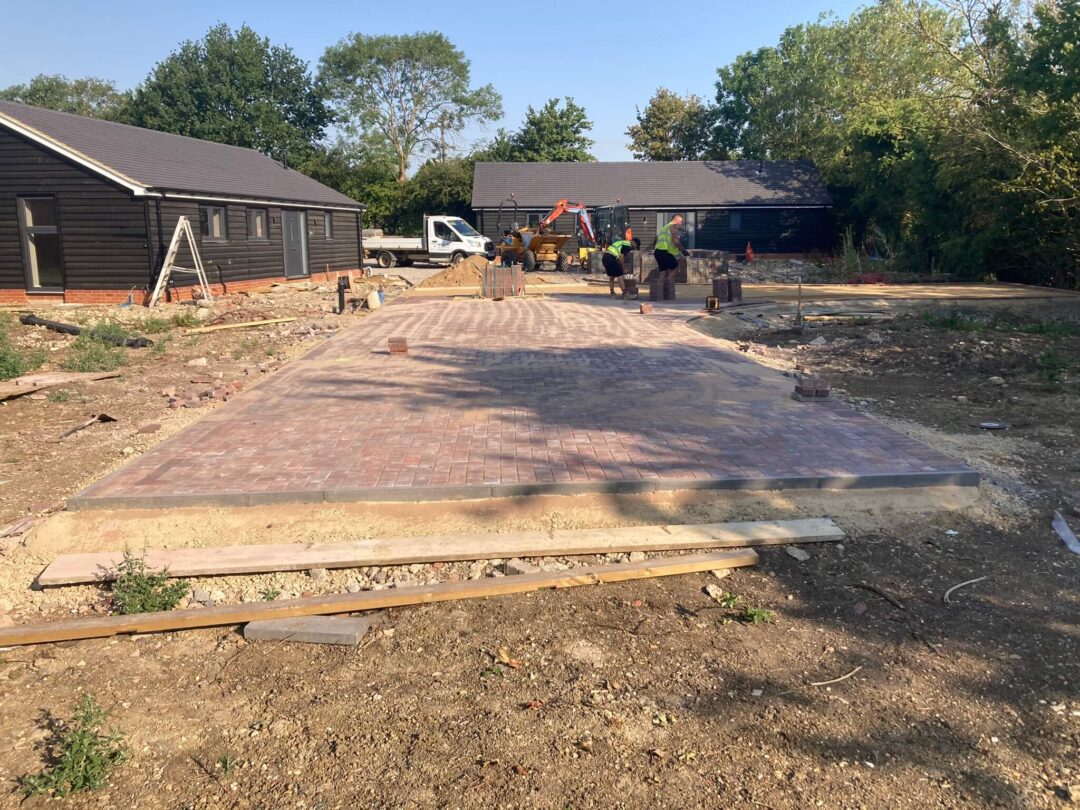
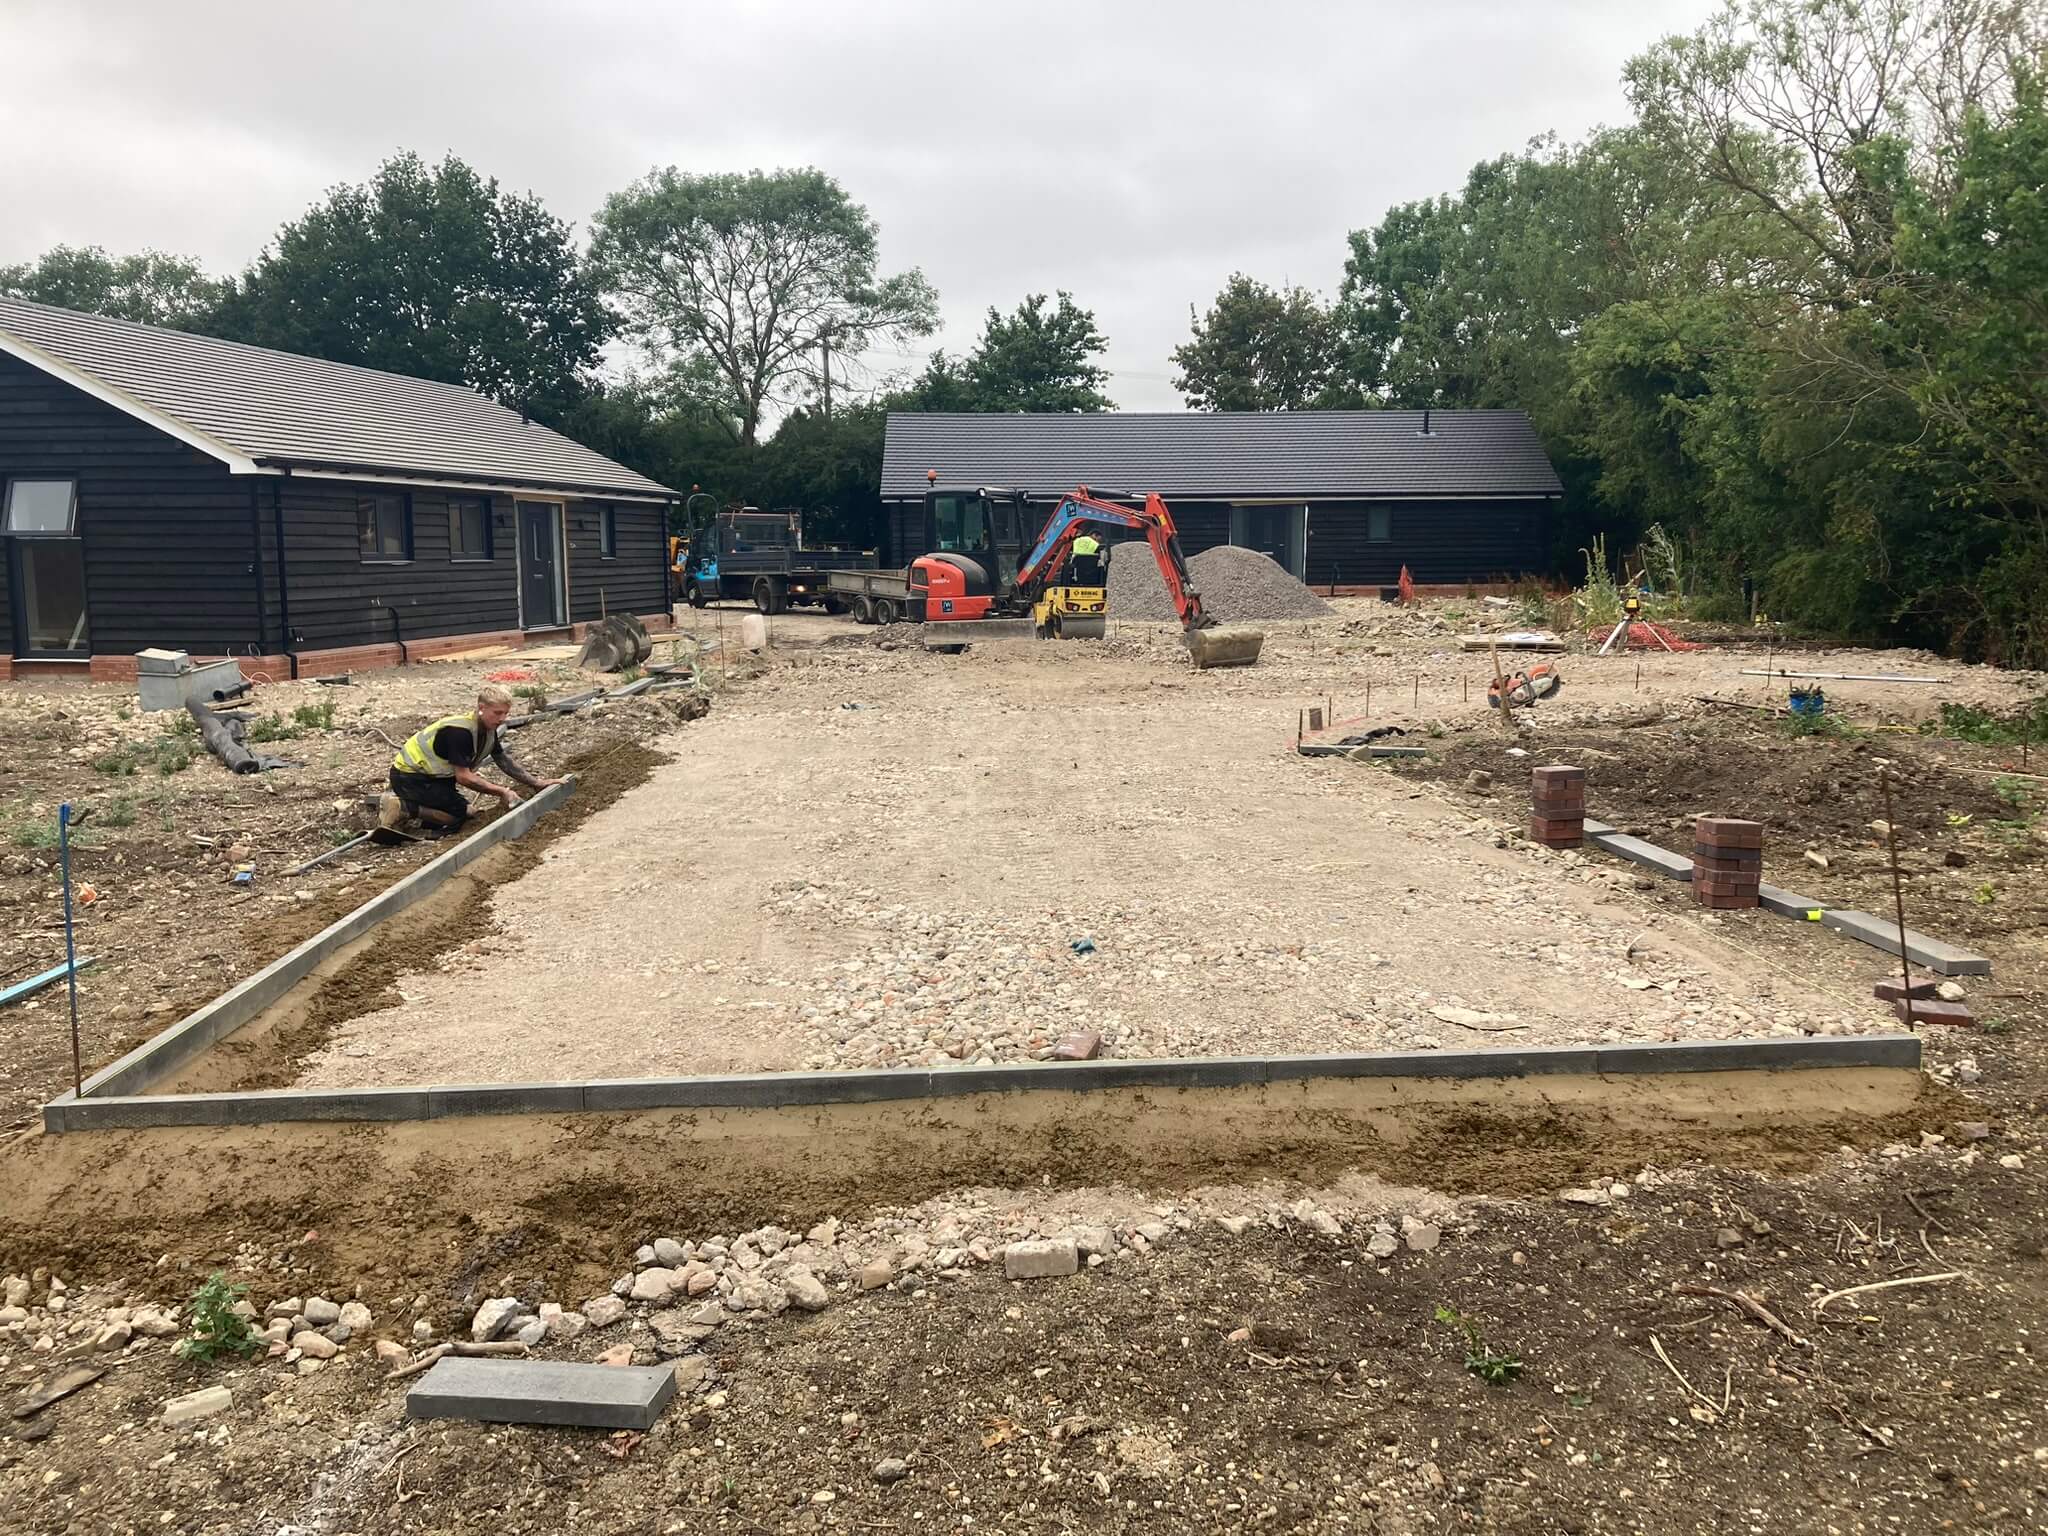
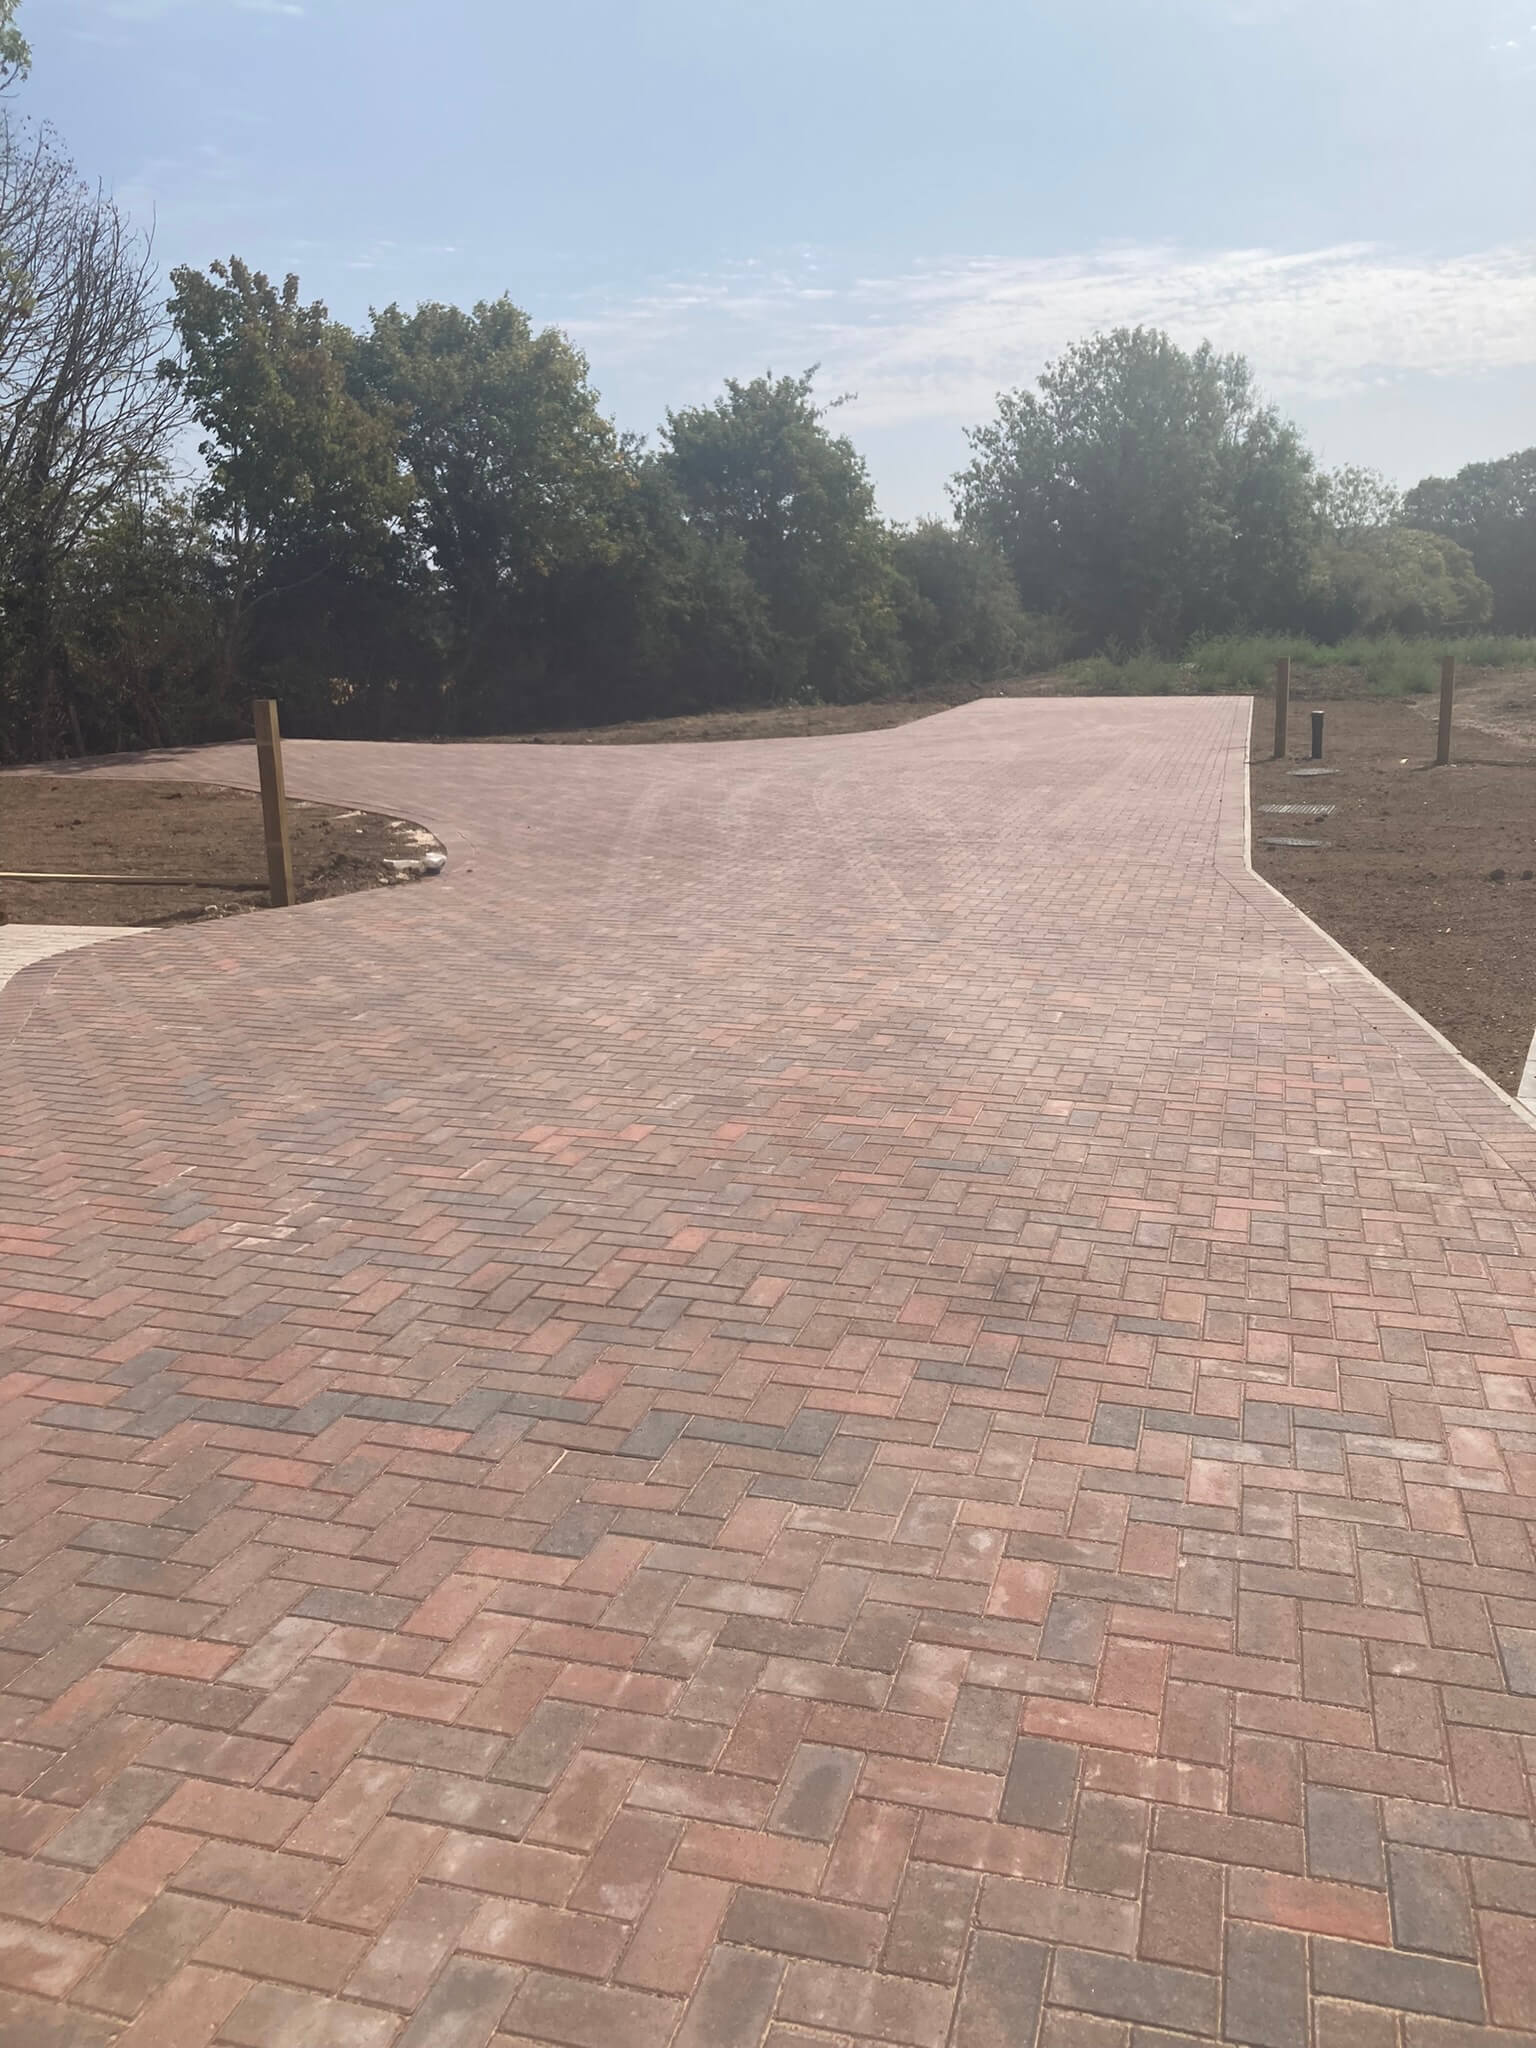
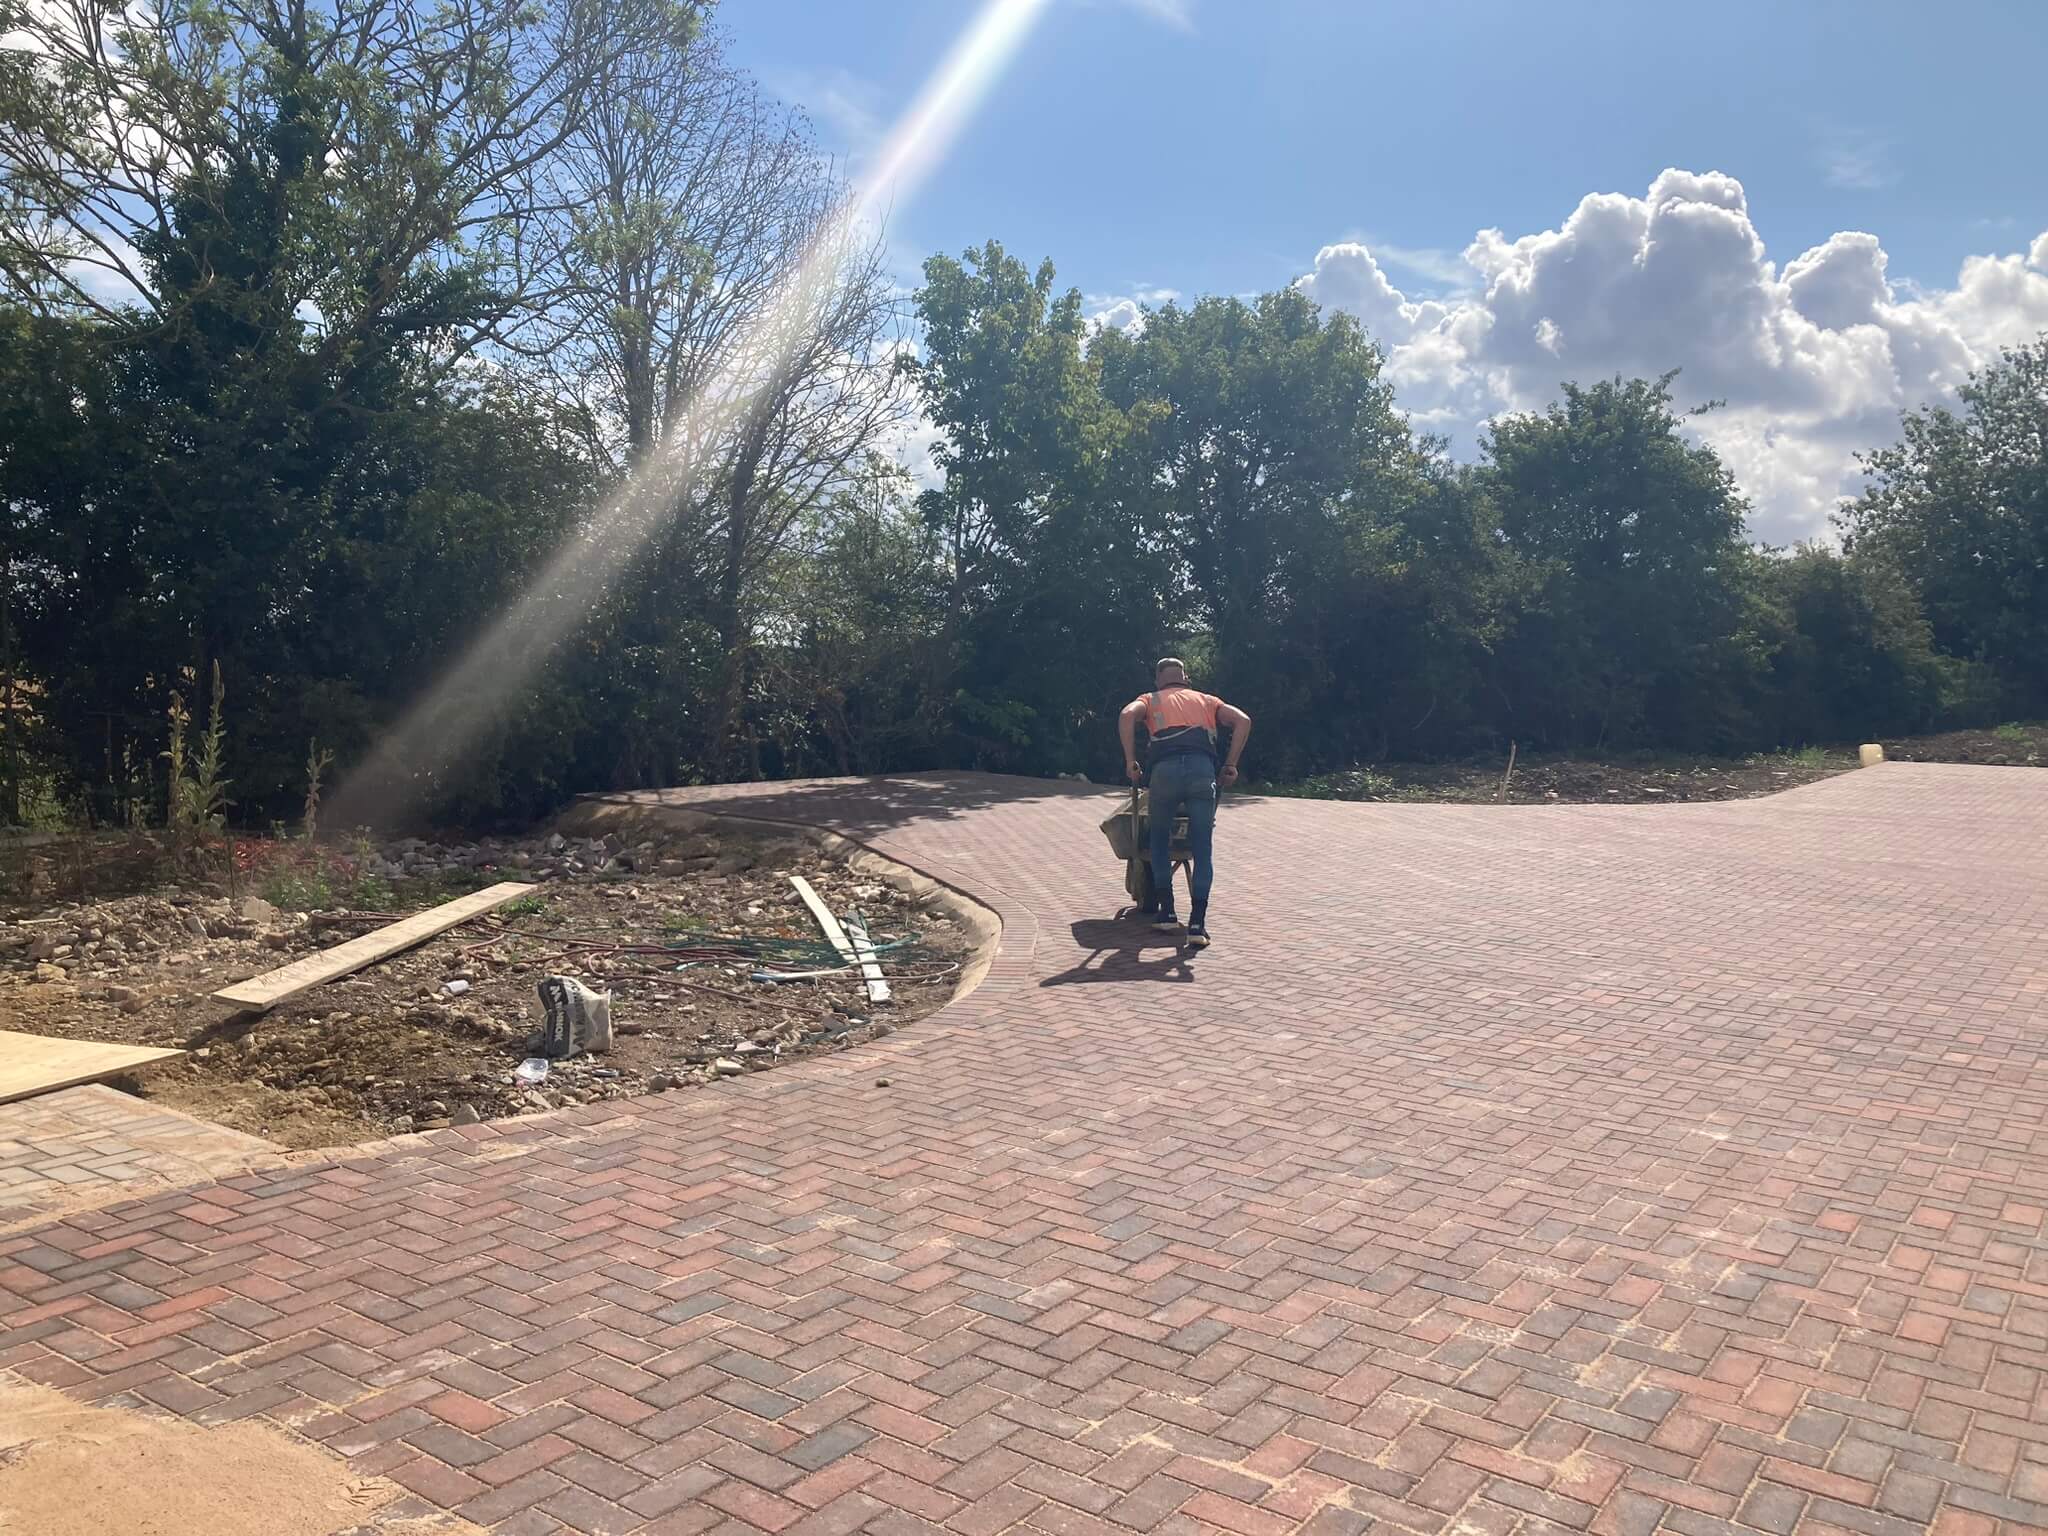
The main shared road between the two barns was done with red ‘brindle’ block paviours, with the parking areas for each property done in grey.
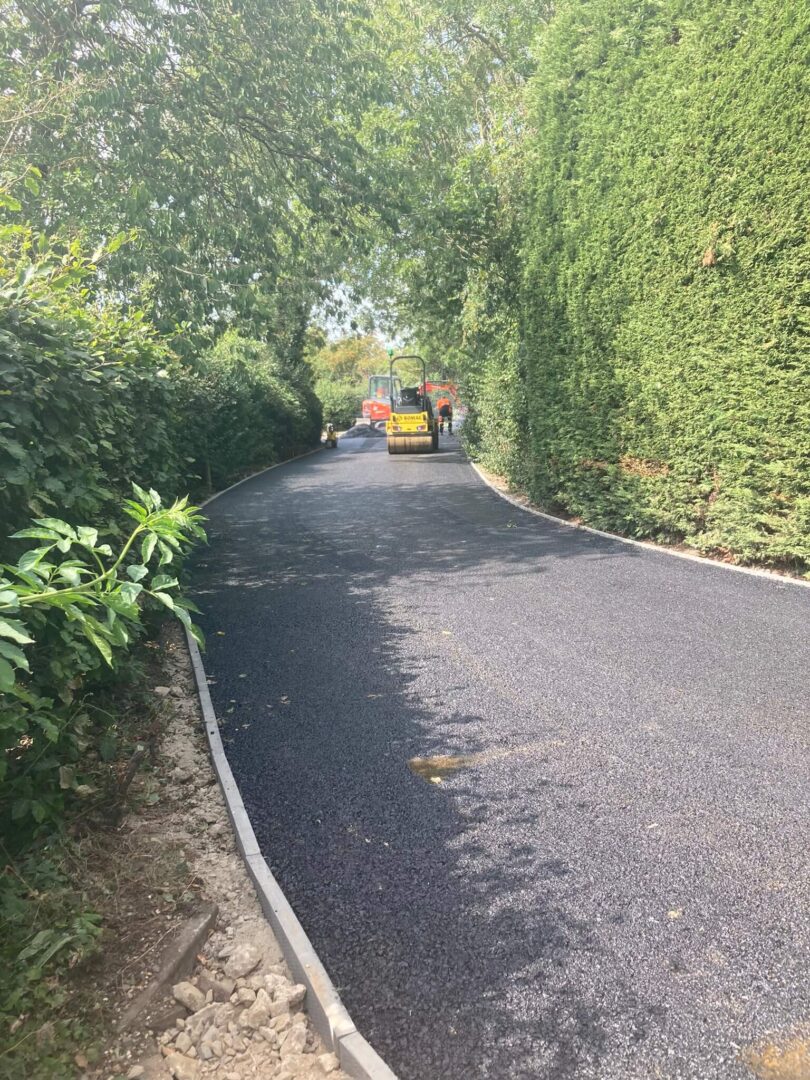
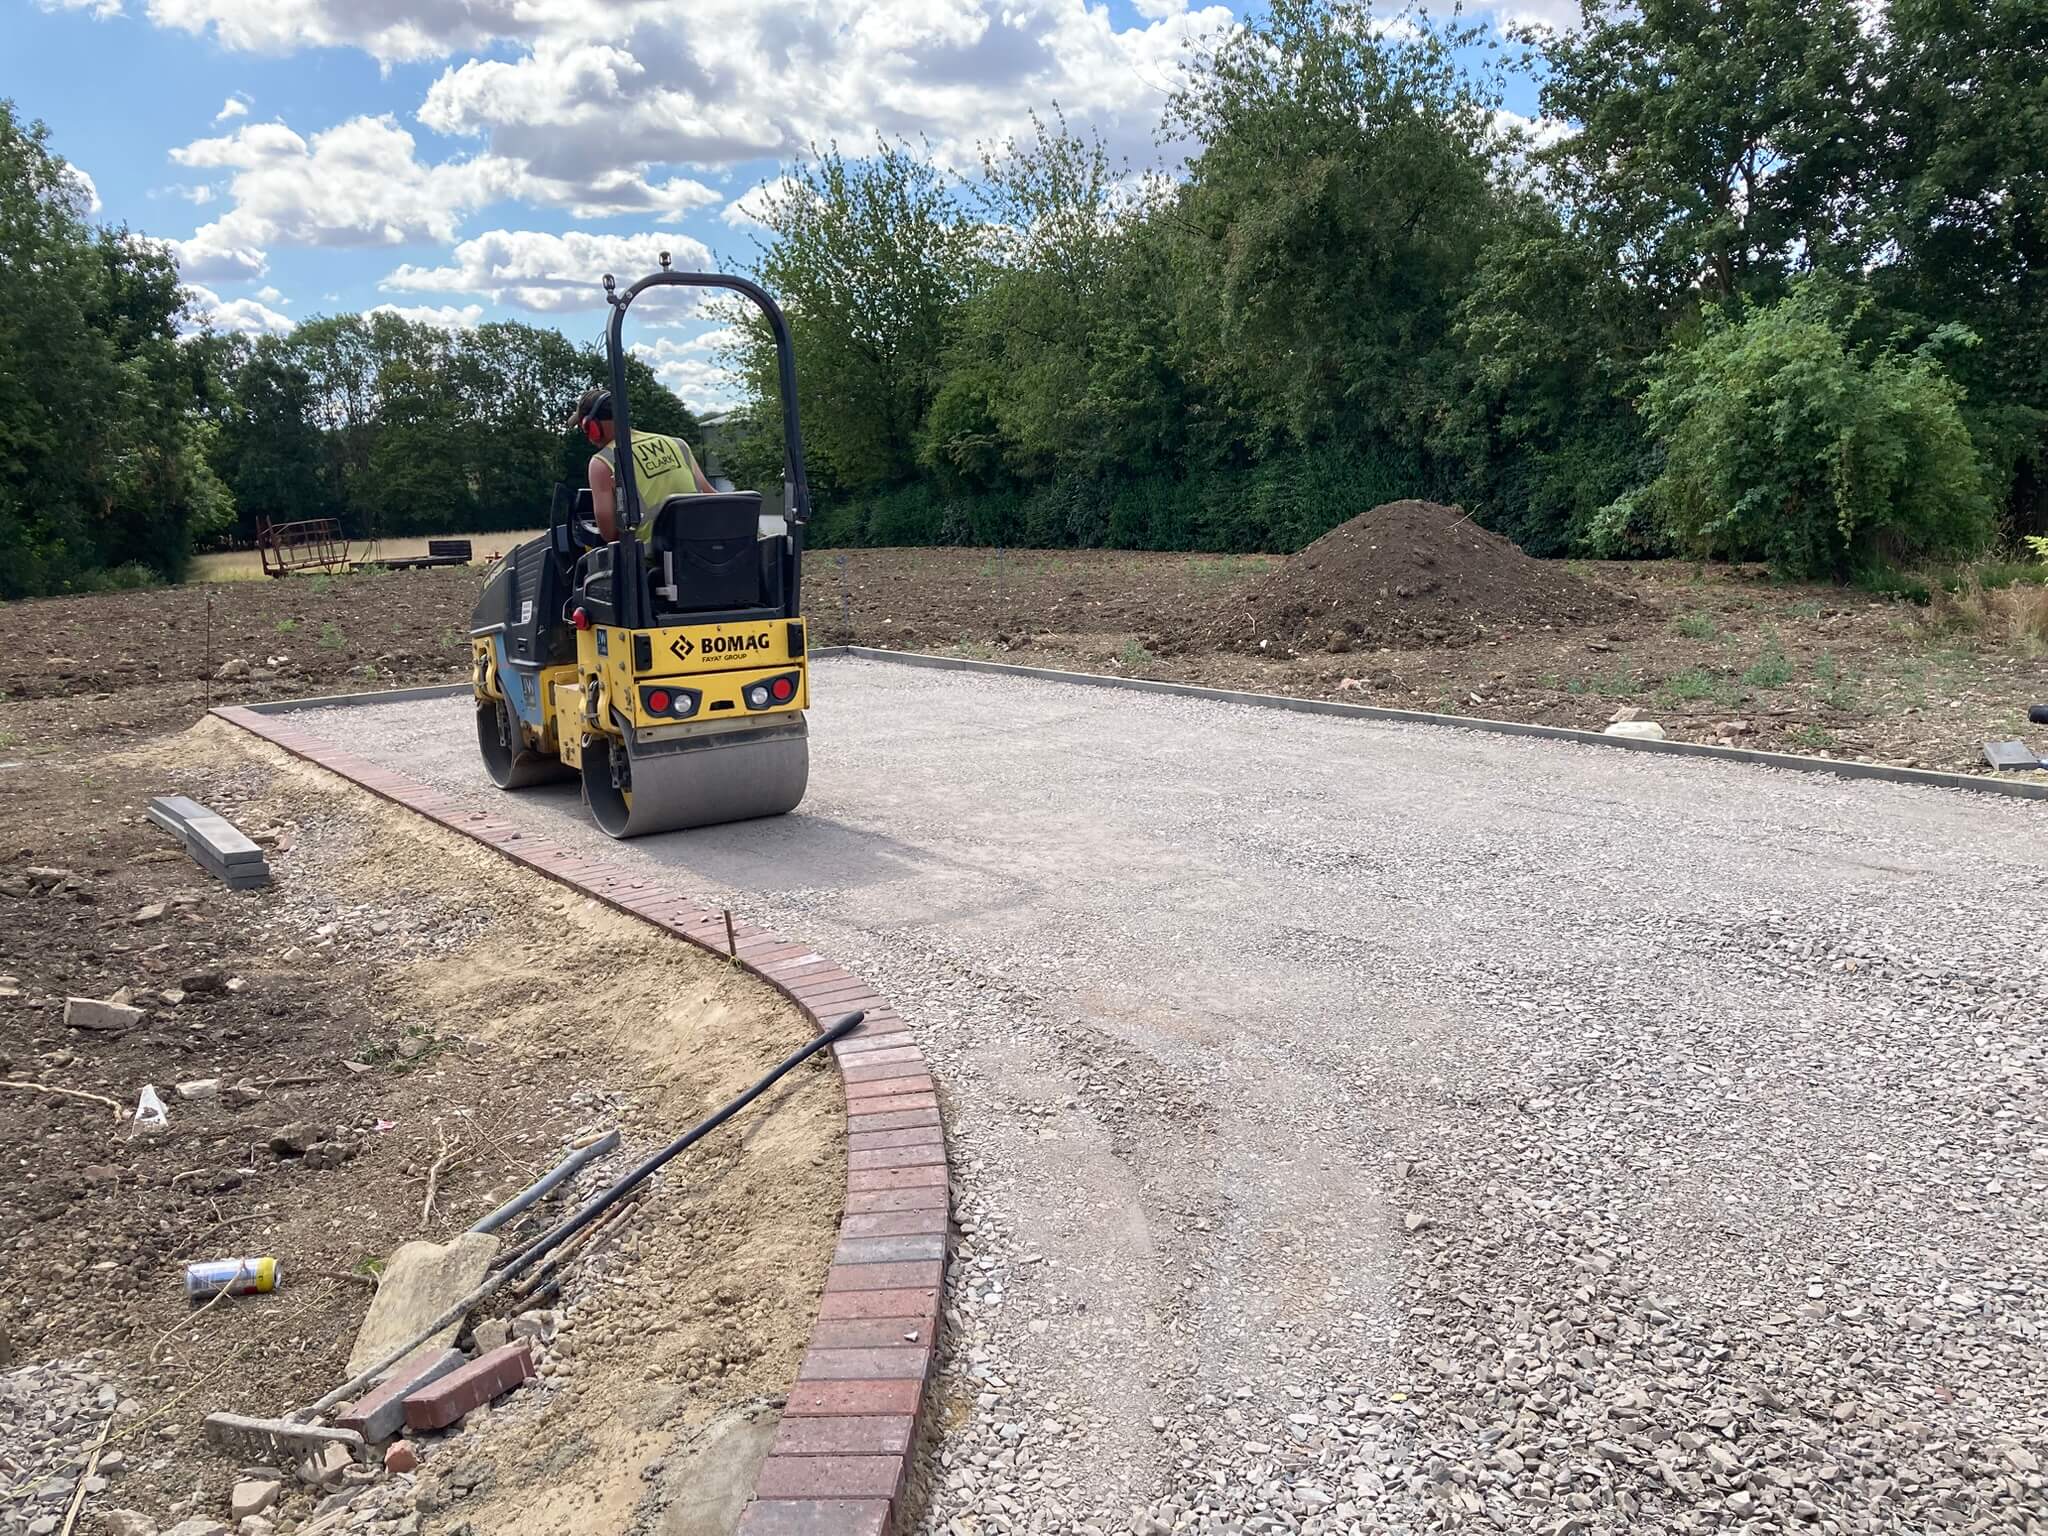
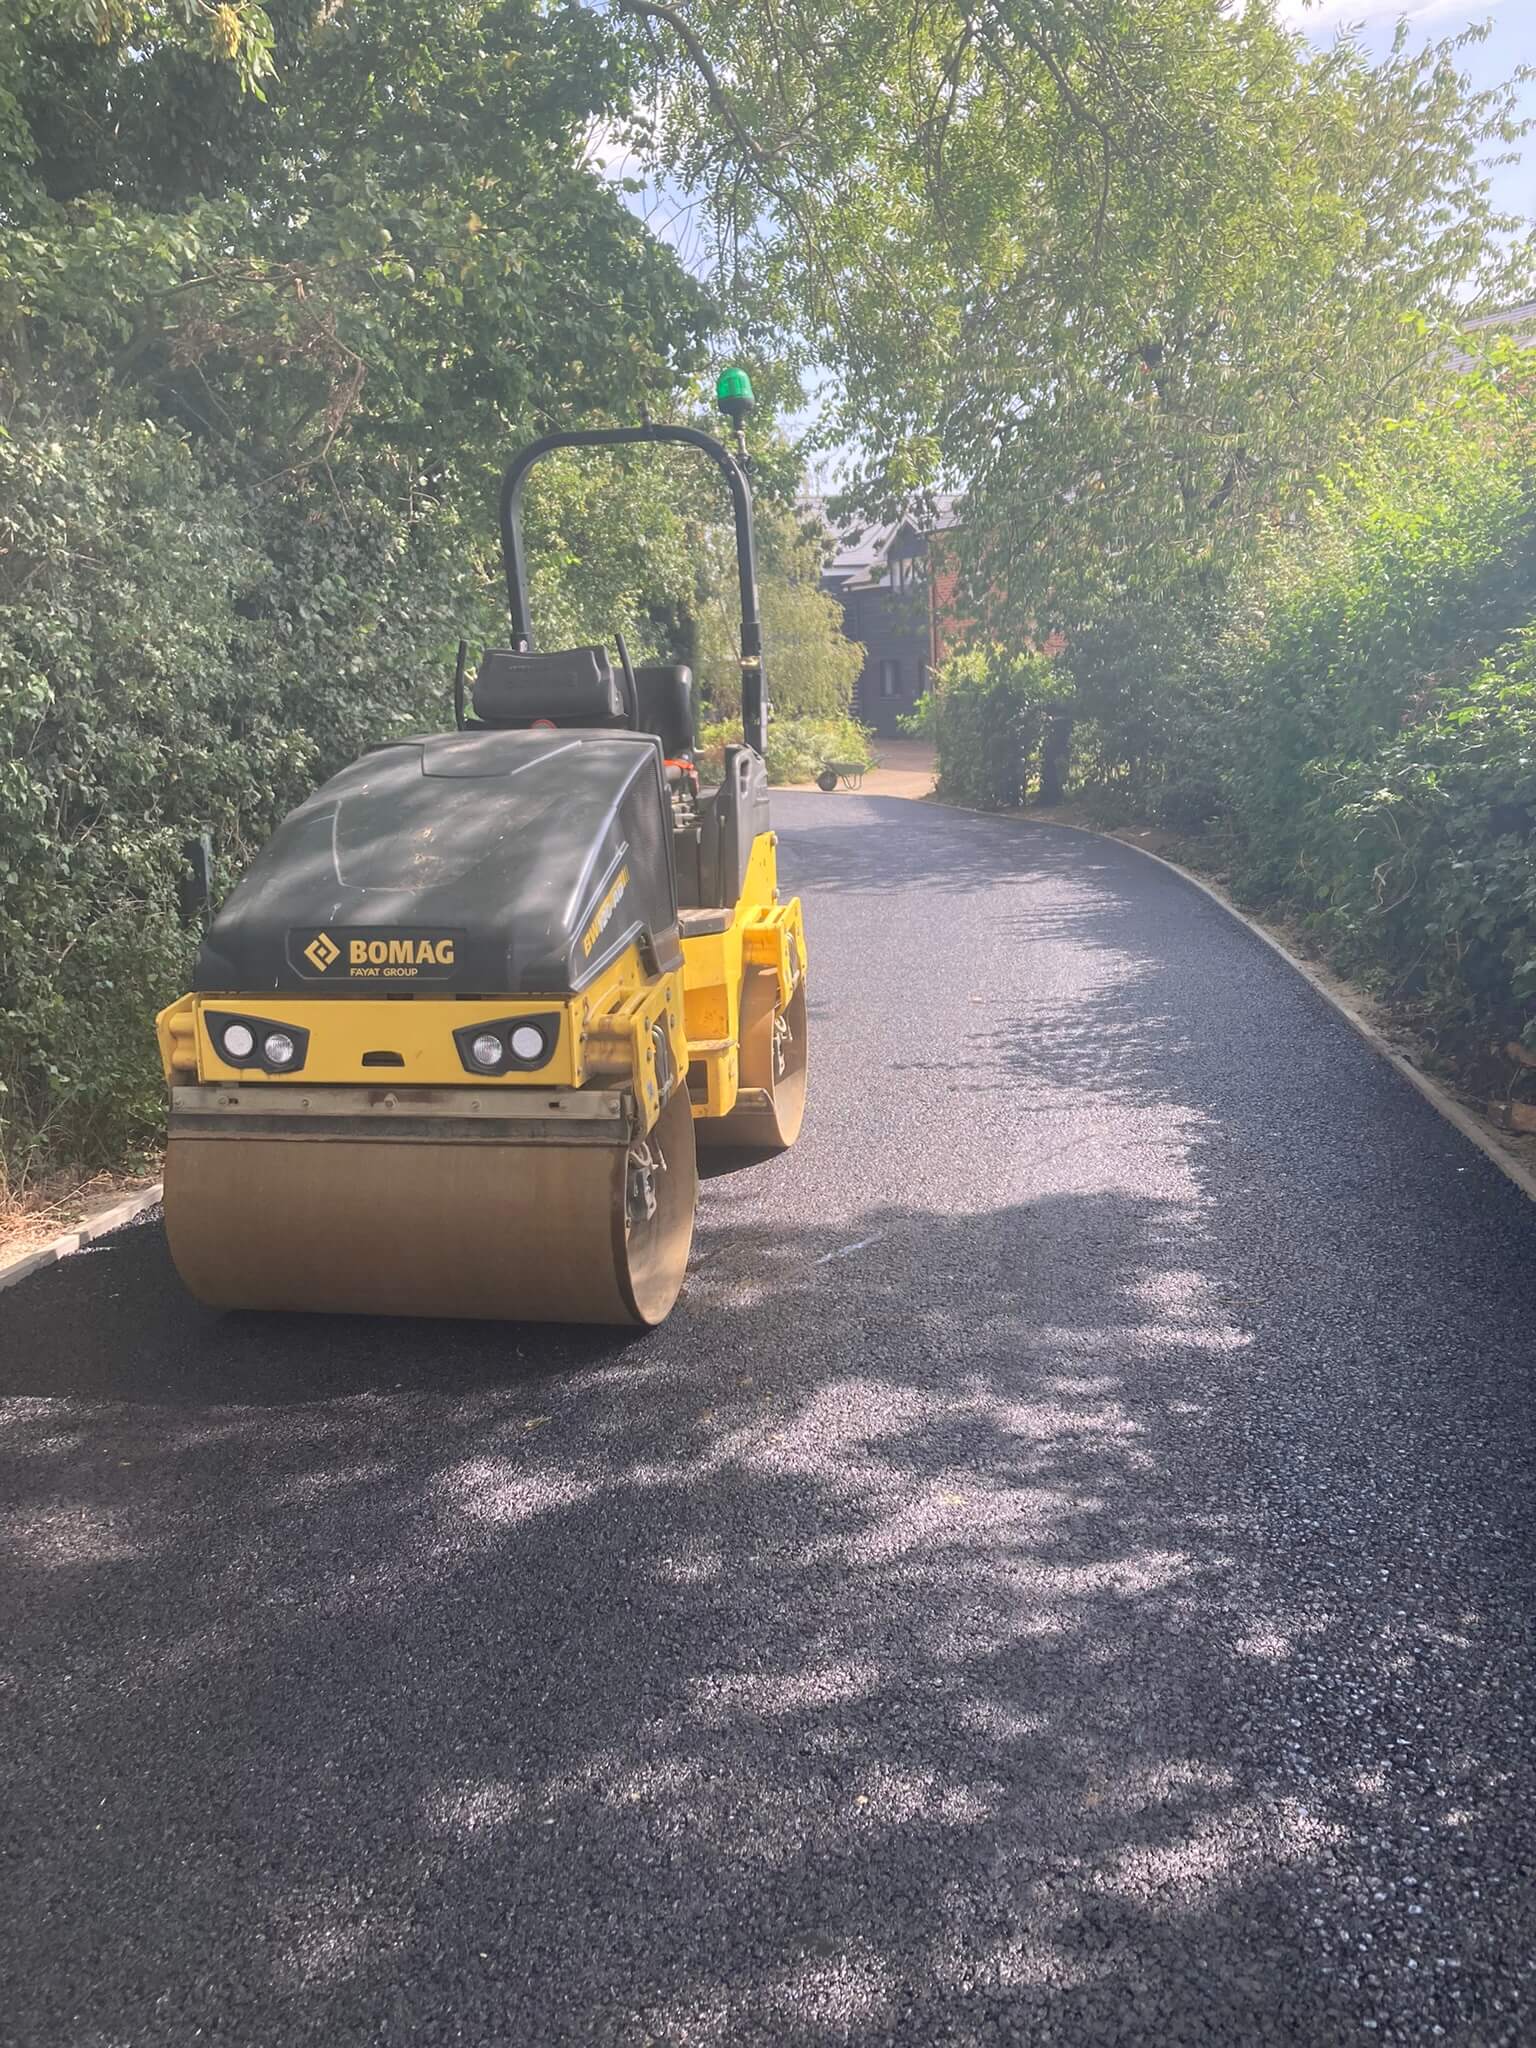
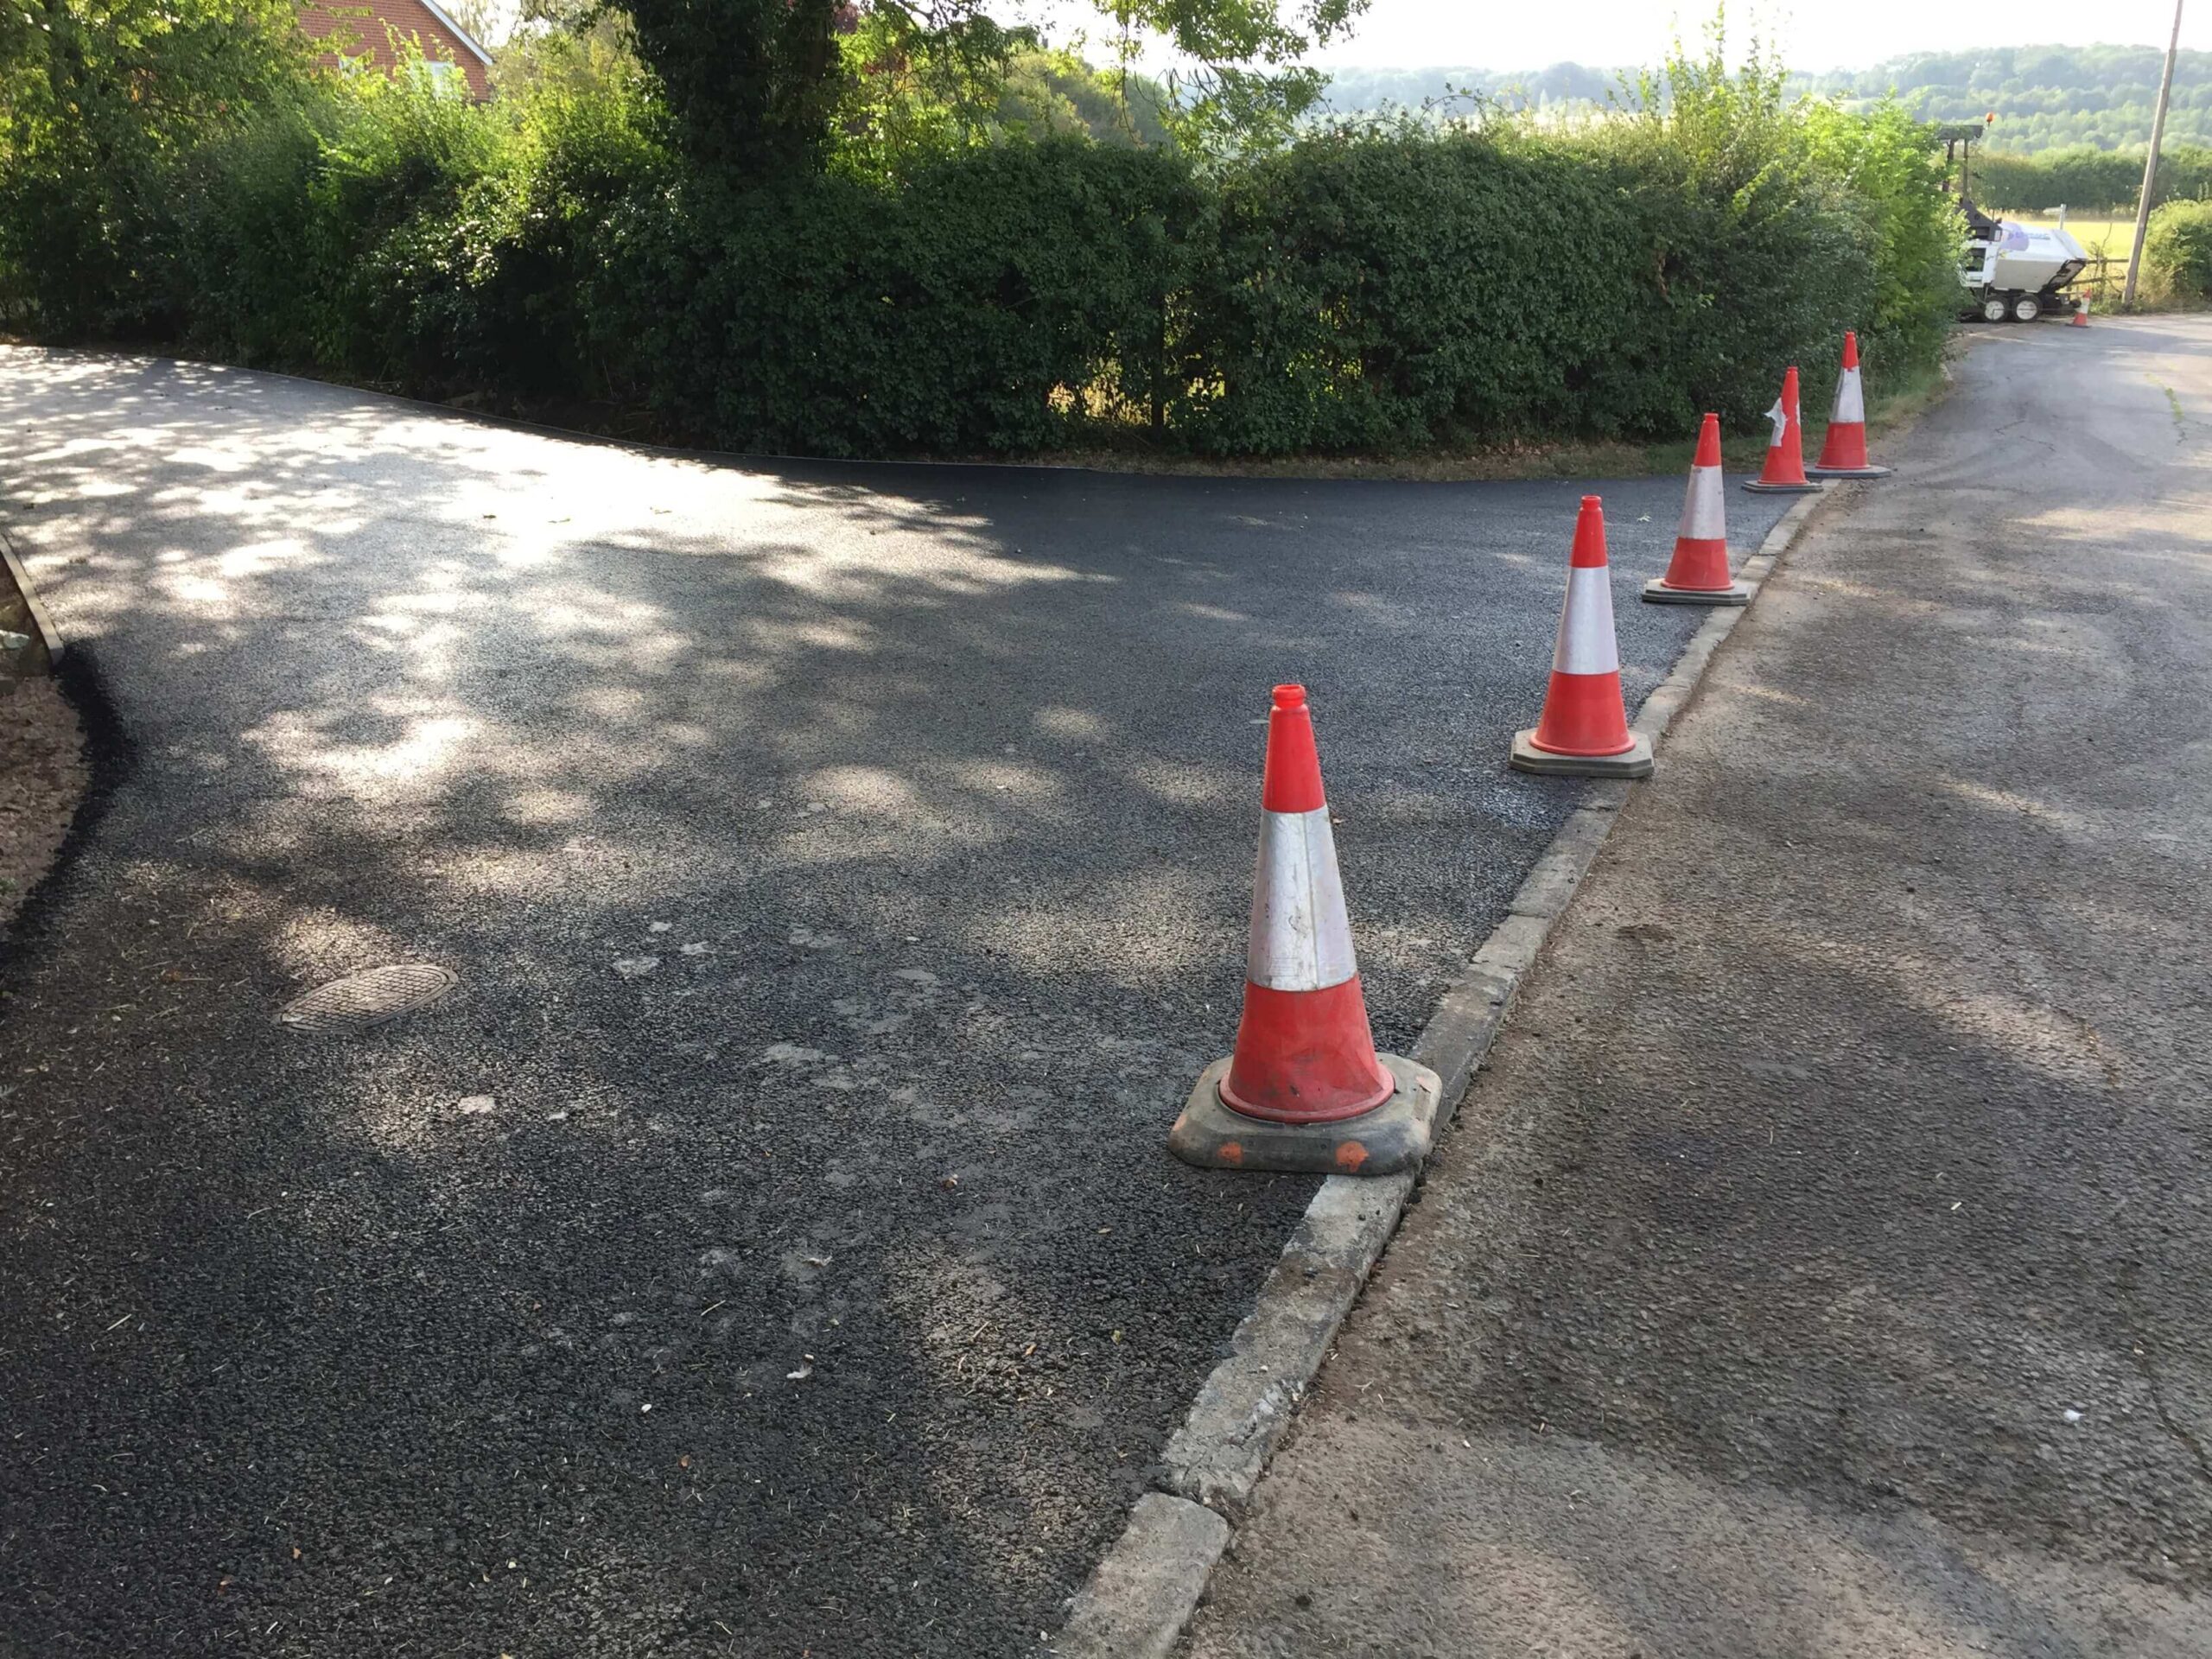
Between the shared block paved driveway and the Highway, the design detailed a tarmac road, with the same ‘natural’ edging kerbs to the sides. We constructed this from scratch with recycled 6F2 and then Type 1 MOT granite on top, and natural grey edging kerbs again to the sides.
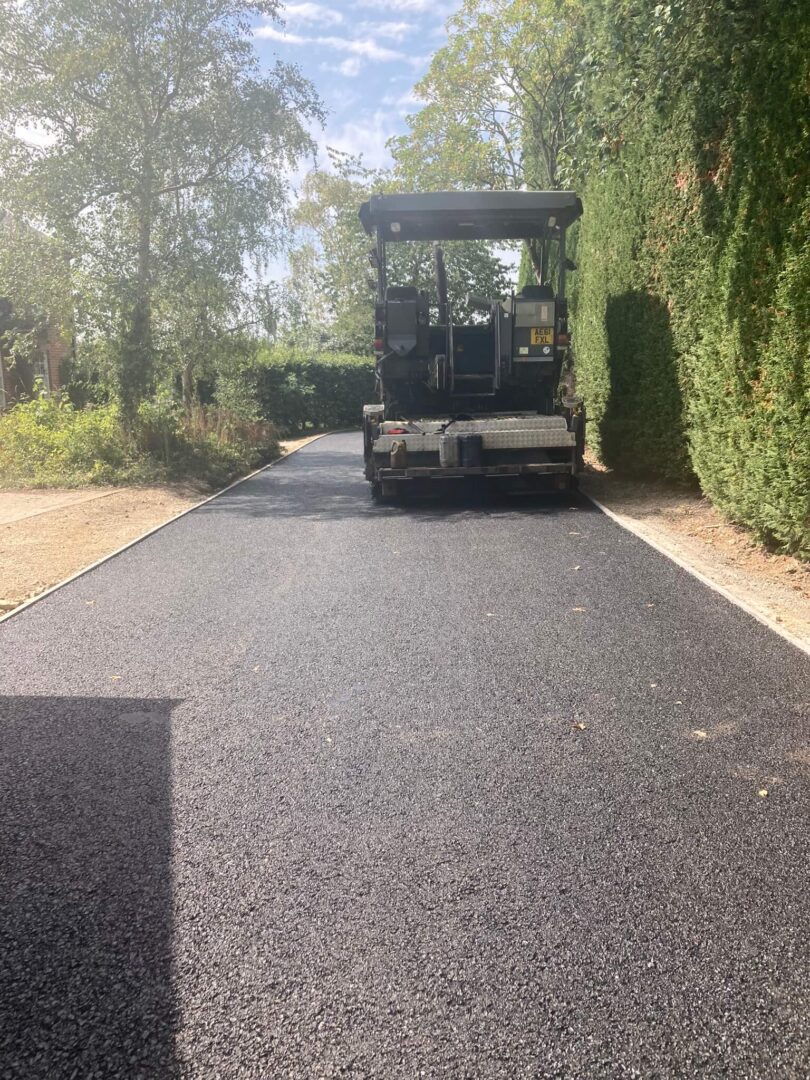
The tarmac make-up was 70mm of 20mm base course and then 30mm of 6mm SMA wearing course to finish. ‘SMA’, which stands for ‘Stone Mastic Asphalt’ is a more durable grade of tarmac wearing course which better withstands turning on, by cars, particularly during warmer weather.
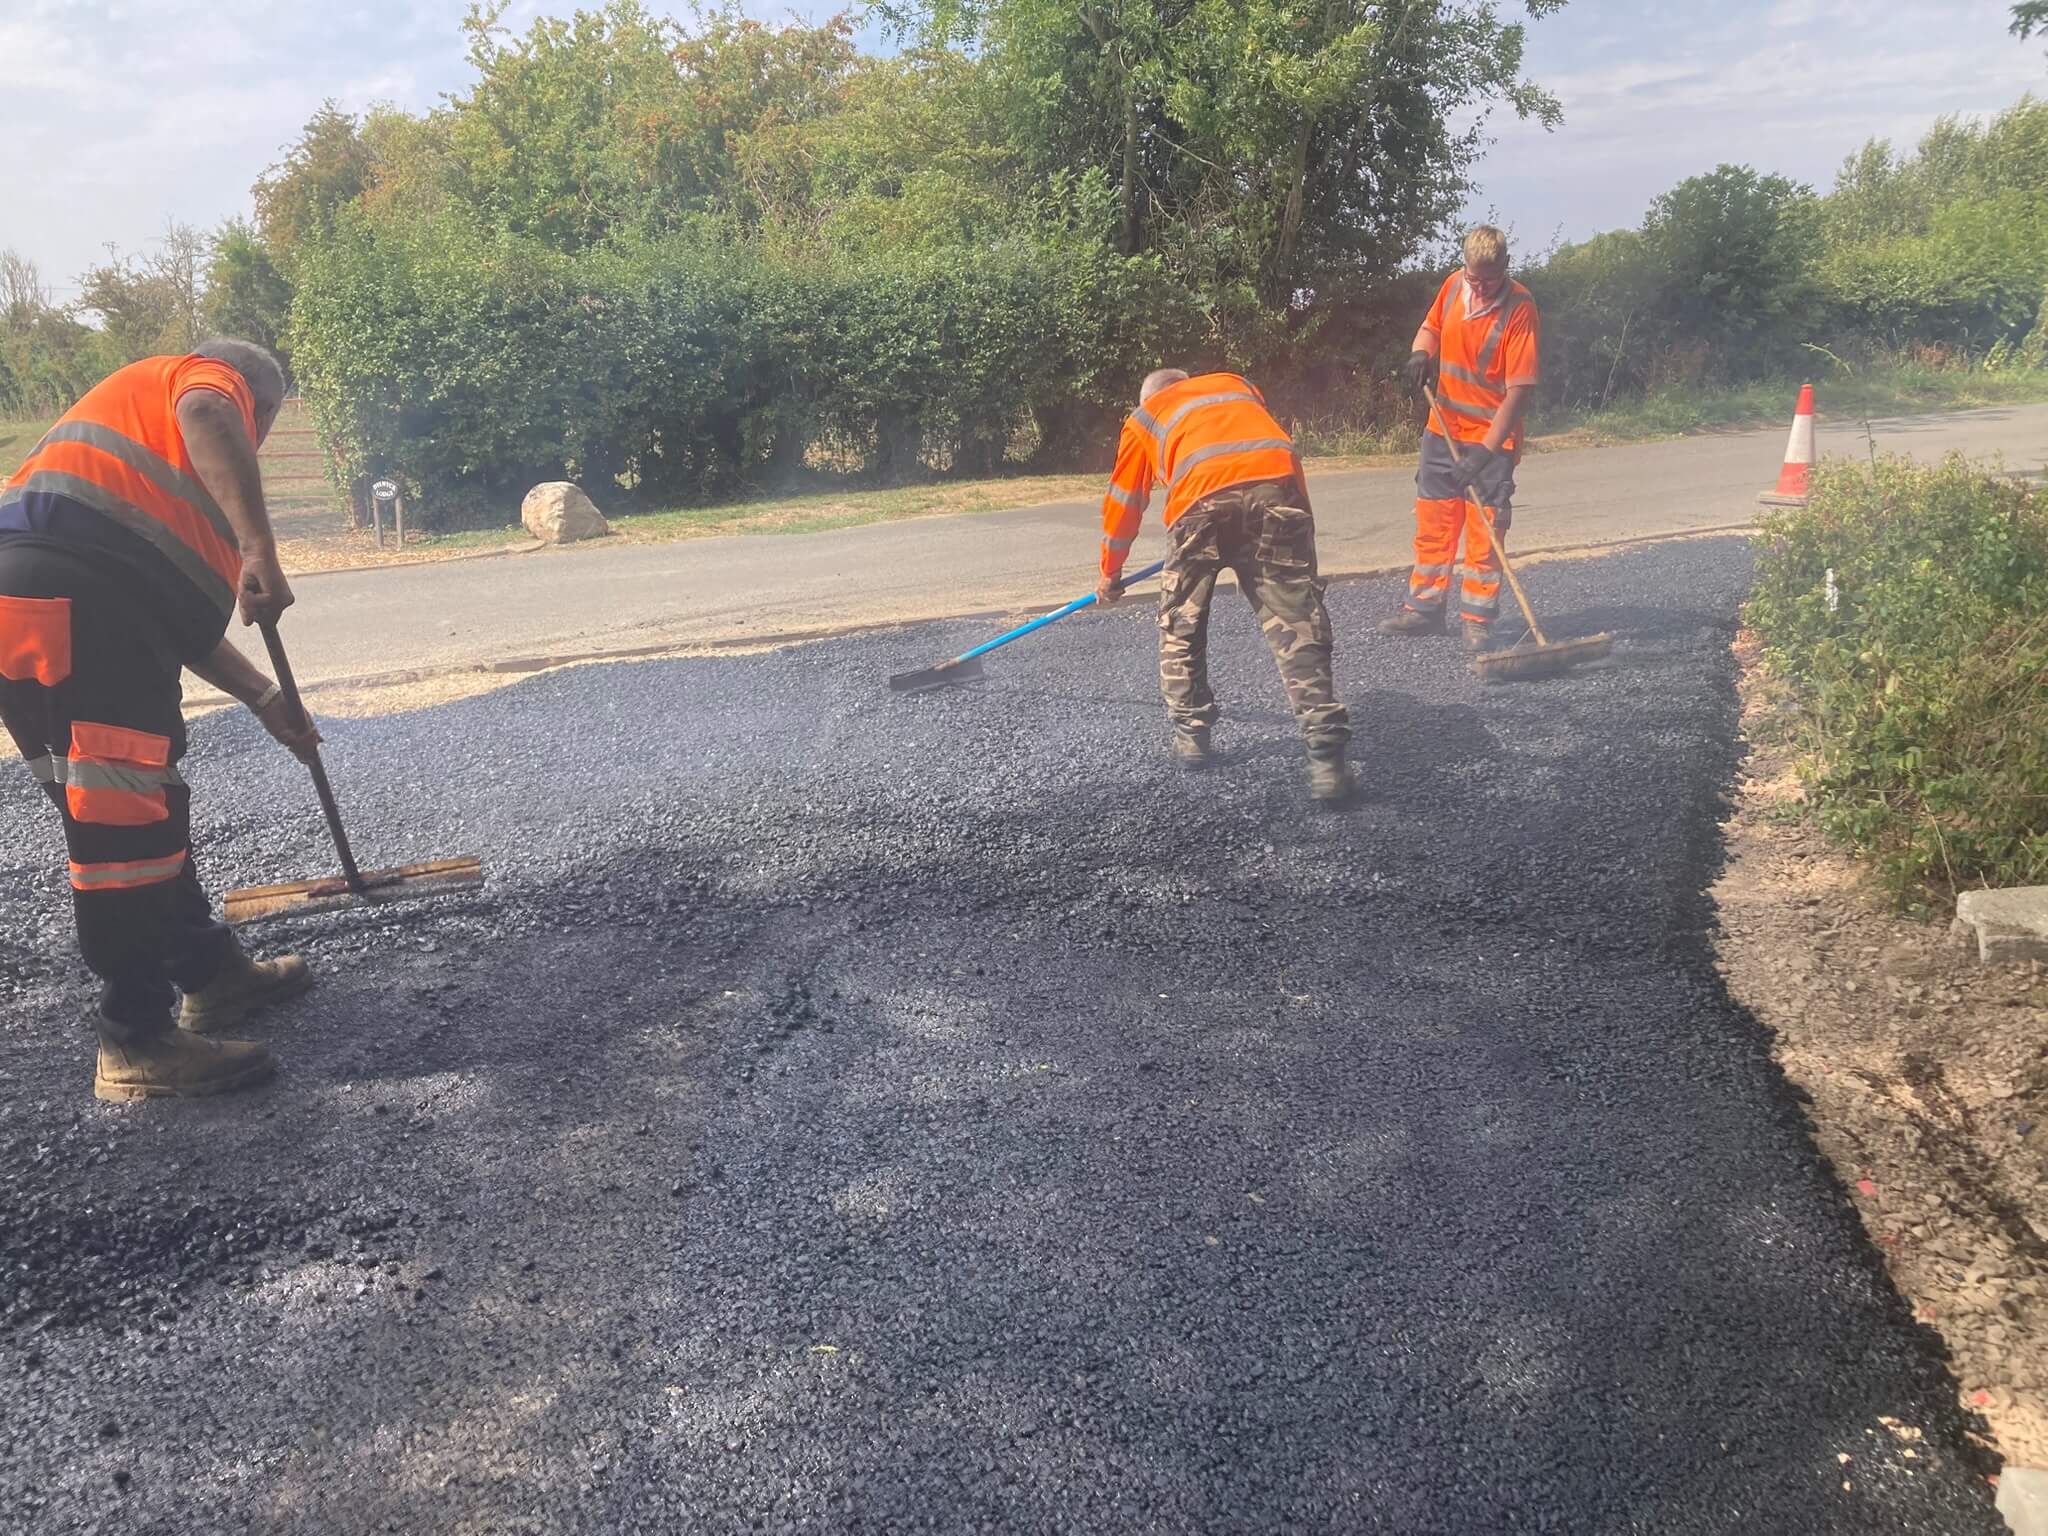
The whole project took 5 weeks from start to finish, we started in the site with the block paving, working our way out to the tarmac road and resurfacing the crossover as well.
With all the paving work done, we dropped back and filled borders and plating areas with 10mm topsoil in preparation for planting, by others.
It was a pleasure to carry out these works for our customer. We originally completed the groundwork for a new build for their father, many years ago, so it was great to be invited to do the groundwork for these two new-build barns (case study here). Six months later, we returned to install all utilities and services for the build, and finally came back on this visit to complete the paving.
Do you require a quote for similar works, click here to make contact
Click here to read more case studies on all aspects of groundwork & civils

Having done the groundwork for this pair of new builds 6 months prior, we were asked to come back and lay various service pipes and ducts to each of the two plots.
To lay services for two new builds, including water pipes, electric ducts & BT ducts

We were delighted to be asked to return to this site to excavate for and lay water pipes, electric ducts and BT ducts from the boundary with the Highway, to the two new builds that we had done groundwork for previously. The groundwork was done 6 months prior and a builder had since got the two shells up and built.
We brought a couple of diggers to site, our favourite 3.7 tonne Kubota digger, and also its younger brother, the 1.5 tonne. One for digging and one for backfilling.
We laid the water pipes first, as these were deepest. Anglian Water had specified barrier pipe, due to the possible risk of the ground being contaminated. Unfortunately, water authorities used to occasionally ask for barrier pipe to be used if they suspected contaminated ground, but now it’s becoming the norm, unless you can prove your ground is not contaminated. We suggested to our customer that he send AW a ground survey that he’d had done previously, which he did. Although AW relented and said they’d allow him to use standard 32mm pipe for half of the 70m run, the other half had to be barrier pipe, due to the site having an agricultural history. Unfortunately, barrier pipe is a lot more expensive than standard MDPE pipe.

We laid these water pipes at a depth of 800mm cover (750mm is the minimum), in sand surround and with warning tape to cover. AW inspected the depths that the pipes had been laid at etc. With these laid, we put in a 125mm ribbed electric duct from the boundary with the Highway, to a location near the first plot. At this point we left an open hole for an electric joint to be done later, and from here we laid smaller 32mm black duct to the meter box on each plot. These too were laid in a sand surround, and with a different warning tape on top.
Lastly we laid a BT duct, this was a 90mm duct from the boundary with the Highway, to a position near the first plot, where we built a ‘No 4’ BT Box with pre-cast plastic sections, and finished with a frame and cover supplied by BT. From here we laid smaller 50mm ducts from this box to each plot, and these ducts were finished with warning tape as well.
A nice simple job for us, and nice and local to us as well. It was a pleasure to return to this site having done the groundwork previously. Click here to read a case study on the original groundwork project for this site.
And we were delighted to have received a 5-star Google review from our customer for this job!


We were approached by a long term customer of ours, a builder and developer, to do the groundwork for a reasonable sized house extension in Towcester.

Our objective was to demolish the existing conservatory. Then to dig and pour footings for the new extension and do the masonry up to underside of block & beam. Then some foul and rainwater drainage, followed by installation of block & beam.
We started by removing the conservatory from site, and we removed this to a skip in our own yard, due to limited space on site. We we’re only able to get a 1.5 tonne digger in to this back garden through a narrow gap between the existing house and the standalone garage. There were a few steps here as well, so we put some plastic down on the steps and then laid type 1 MOT to form a ramp for the digger and to enable easier access for wheelbarrows back and forth. With the digger in the back garden, we started breaking out the floor of the conservatory. This came out easily enough, as it was only about 150mm thick, and not reinforced.
The footings were a bit more difficult to remove. At about a metre deep, which is a bit unusual for a conservatory, we had to break with the breaker attachment on the machine, then put the bucket on the machine and dig out what we’d broken. Then we had to put the breaker back on, then the bucket back on, and so on. We got the footing broken out in a bit over a day, and then we were ready to set out for the new footings.
The drawings asked for a 1-metre deep footing, but this is standard, and final depths were subject to the Building Inspector’s decision. There were a few small trees within 10 metres, and ordinarily any trees within 15 metres will have an effect on the footing depth, subject also to ground conditions of course. The Inspector asked for slightly deeper footings on two sides, to a depth of 1.4 metres, and then stepped back up to 1 metre on the final stretch.


We poured the footings to a depth that would enable 300mm of masonry to be laid to the underside of the beams (block & beam floor on this one). There was 8 cubic metres of concrete required in the footing, so we used a ‘line’ pump to get the concrete round the back of the house. We dug the oversite off to the required depth the next day, so that we had 250mm clearance underneath the block and beam floor.
With the masonry done, we filled the cavity to the required level, with Gen 1 concrete. Due to the available access, we had no choice but to carry the concrete beams round, one by one. These were laid within 2 days nonetheless, and the infill blocks and splits done thereafter. The floor was sealed with cement slurry, to complete the block and beam.


There was some drainage to complete for the project including foul and also rainwater from the new roof. The extension was generally for a new kitchen, so we laid new drainage from the proposed drainage points, to the existing foul manhole within the patio. We dug out for and laid underground rainwater pipes from the new downpipe positions. We had planned to dig out for and form a soakaway, but we discovered there was a dedicated surface water sewer in the Highway, and the existing rainwater pipes were connected to this system. We spoke to the Building Inspector, and he was fine for the new rainwater pipes to connect into this existing system, within the confines of the property.
With all of this work complete, we handed over to our customer, who continued with the build. It was good to carry out a small domestic job, and locally as well. A lot of our work is far from home and often on much bigger sites. Please contact us should you have a similar project you’d like help with.


We had already been asked to do the groundwork for a new build on this site, but the existing bridge was not suitable for bringing multiple lorries across, to remove hundreds of tonnes of spoil from site and bring all the materials in etc. Therefore a new bridge in the form of a culvert was proposed and designed, and we were instructed to install this.
Our objective was to demolish the existing concrete bridge with its steel supports, install the culvert sections and then form a road on top including kerbs and tarmac etc.
We decided to carry out these works in the middle of the summer, as the flow of the stream would be at its lowest, as opposed to the wetter months, when the stream was significantly faster-flowing. We started by demolishing the existing bridge, taking care not to pollute the stream with debris from the old structure. The culvert sections could have been laid on consolidated type 1 MOT, but due to the stream being live, and the volume of water being considerable even during the drier months, we decided to lay a concrete slab instead.
By laying a concrete slab, we could envelop the shuttering in plastic and divert the stream around. However we were struggling with room, as the concrete culvert sections took up more than the width of the stream, there was not much room to divert the stream around. Therefore we installed a small catchpit ‘upstream’, and from here we ‘over-pumped’ the work area to reduce the flow of the stream.
With the flow significantly reduced, we were able to excavate for and form shuttering for a concrete pad, for the culvert sections to sit on. We put a double-layer of thick dpm plastic within the shuttering, and formed a concrete slab 200mm thick, with 2 layers of reinforcing mesh to the middle. The concrete was allowed to cure for two weeks before the concrete culverts sections were scheduled to be delivered.
We looked into different ways of lifting the concrete culvert sections into place. We originally planned to have a 13-tonne ‘track machine’ on site, this would lift the sections off the lorry and onto the concrete pad. But due to trees on either side of the site entrance, some of which had protection orders on, we had to look at bringing a crane onto site. The size of crane required meant that it would have to sit in the road, and this in turn would close half of the road off for many hours. This also had implications for pedestrians as they would be passing on the pavement underneath the crane and through a live site, in effect. We spoke to Northants Highways and it was decided that we would use 2-way traffic lights to control the traffic. And that the pedestrians would be diverted into a temporary pedestrian walkway around the crane as it sat in the road.


We instructed A-Lift Crane Hire from Northampton to assist us with these works. (A few other local crane companies told us this job couldn’t be done!) We had to co-ordinate the crane hire, the delivery of the culvert sections, and the traffic lights, and all other deliveries, all to happen on the same day. The crane lift was particularly difficult due a combination of various overhead BT cables and also the many trees that surrounded the front of the site, it was very tight as the 7-tonne culvert sections were lowered down amongst all these overhead obstacles! We decided on a strong sand and cement mix to bed the culvert sections onto, on top of the pre-formed concrete. There were only 3 culvert sections to go onto the concrete base, but at 7 tonnes each, we didn’t want to be lifting them on and off our screed too many times, so we spent a lot of time getting the screed exactly right, on top of the concrete slab.
The culvert sections interlocked where they met, and we had to seal them at this point as well, with bitumen and with thick flexible bitumen strips as well.
Looking down the culvert sections either side, we laid a double sand-bag wall 450mm thick, to retain the fill between the long edges of the culvert sections. We used 6F2 for the fill, which we compacted in layers with a heavy duty trench wacker, as the road above was to go on top of all this construction.
Before we could form the road on top of the new culvert, we had to lay services across to the proposed new build. These included electric, BT & Water. With these in, we brought type 1 in to form the sub-base of the new road. We laid kerbs either side to retain the tarmac and then laid 150mm of 20mm base course tarmac, to enable heavy traffic across the culvert/bridge for the duration of the build. The tarmac will be topped later on at the very end of the build, with a 6mm top coat.
Our last job was to lay oak sleepers at each end of the culvert, purely for cosmetic reasons. We finished these works just in time, as the wetter weather set in towards the end of September and the flow increased significantly. It was a pleasure to carry out this very exciting and challenging job for our customer, and from here we were ready to make a start on the groundwork for the new build. Case study coming soon for this.


We were approached by David, a friend of his recommended he contact us regarding his project whereby he required a sewer connection and various other utilities laying from his barn conversion, all the way down to the Highway, 250 metres away.

Our objective was to connect to the sewer in the Highway and lay pipework to the boundary with the property. And then to lay drainage including pipework & manholes, from the boundary with the Highway, all the way to the location of the barn conversion, over 200 metres away. We also laid other services in the same trench.
.
As is usual, we took care of both the Section 106 to Anglian Water, and also the Section 50 to Highways. Our customer already had drawings for the proposed drainage in the site, but we asked for amendments to be made to include the work in the Highway. These included for the pipework to be laid across the road to the connection point in the footpath. A ‘drainage drawing’ submitted to the Water Authority for a Section 106 has to include the pipework, detailing the pipe material & size, it has to detail the size of the existing sewer we are to connect onto, and the method of connection. In this case the method of connection was ‘Junction Insertion’.
With the drainage drawing amended, we facilitated the Section 106 application to Anglian Water. This was passed within a couple of weeks, and with the Section 106 Approval Letter in hand we made the application to Highways for the Section 50 – you cannot legally apply for a Section 50 to ‘dig up the road’ before you have the Section 106 from the water authority. Highways have a duty of care to ensure we have permission to connect onto the target apparatus, in this case the public sewer. As part of our Section 50 application to Highways, we nominated ‘give and take’ traffic management, as the road was a quiet ‘dead-end’ road without much traffic. The Section 50 was approved within 3 weeks, as is usual for a simple S50 application – but beware, the application can often take much, much longer. Click here to find out more.
We had to give 3 weeks’ notice to Highways that we wished to use our Section 50 Licence. We started on the ‘other’ side of the road to the site, in the footpath, where we believed the public sewer to be. We found the pipe at 1.6m deep, and under various other services. We made the connection onto the public sewer on day 1, and this was inspected and passed by Anglian Water on day 2. With the connection made and approved, we worked our way across the road, laying 100mm clay pipes in the direction of the site. We completed the work in the road in two halves, reinstating the first half with tarmac before continuing with the second half. The work in the Highway was complete in 6 days, including all reinstatement.
We arranged with our customer to carry out the works in private property straight after the work in the Highway. The work in private property included laying 110mm plastic pipework for the foul drainage, and various manholes along the way, and also other services relating to the barn conversion. These included 125mm electric duct, 90mm BT duct, 32mm water pipe and also a spare 63mm electric duct for future use, i.e. electric gates or similar.

We dug various trial holes and CAT-scanned the site for electric, and luckily found there to be no services in the first half of the route. There was some electric in the second half nearest the barn conversion, we marked these and also dug exploratory holes to ascertain depth of cables etc.
The electric ducts were supplied by National Grid, as is usual, and we collected them from their local depot. We dug our trench about 1.2m deep. The foul and the water pipe were laid towards the bottom, the foul in gravel surround and the water in sand surround, with warning tape to cover. The two electric ducts were laid above and also the BT, and laid in sand surround and with more warning tape to finish.


The services were all laid to one side of the farm track leading to the barn conversion, but we had two tarmac roads to cross further up, which we reinstated with tarmac afterwards. We pulled draw cords through the ducts to enable cables to be pulled through later. With the total distance of pipework being in excess of 200 metres, and with four separate rolls of 32mm water pipe being laid and joined together, we decided to fusion-weld the water pipes together so we could be sure that the joints were 100% watertight under pressure later on when the connection was done in the Highway by Anglian Water. The most common way to join water pipes together is by way of ‘compression joints’, but it is harder to know for sure that the connections are good, in advance of the pipes being live, and we wanted to have confidence that we could backfill in advance of this.
All trenches were compacted in layers and reinstated, whether it be with grass or topsoil, or tarmac where we crossed roads further up. The ground at the top was particularly wet, and some of the foul pipe runs were in excess of 1.8m deep here. We found various land drains running through our trenches at this point as well, which made our job harder, with water pouring into our trenches as we were excavating and laying various pipes and ducts. With all of the trenchwork complete, we went back to the bottom of the track and tidied the site from start to finish, scraping the farm track as we went, and hosing and sweeping where required


Time taken to quote for the works: Less than 1 week
Time taken to obtain Section 106 Licence from AW: 2 weeks
Time taken to obtain Section 50 Licence from Highways: 3 weeks
Leadtime to use S50 Licence: 3 weeks
Time taken to do the work: 3 weeks
Total time: 12 weeks
Do you need a sewer connection needs doing? Click here to enquire.
Don’t leave it too late for a sewer connection, most people do! Read our article here: How long does it take to do a sewer connection?
Click here to see more of our case studies.

We were approached by a regular customer of ours, who had been redeveloping a large property in the village of Knuston in Northamptonshire. The driveway had already been block-paved in the main. The entranceway was being made bigger with new walls and electric gates, and the customer wanted tarmac for this part. There was an existing crossover, in tarmac, but it was very tired and falling to bits, so it was decided to resurface this at the same time.

Our objective was to lay tarmac in within the new entranceway and between the new stone walls, but also to excavate the existing crossover and to relay with tarmac, all at the same time.
Whilst our customer was having completing the remainder of the block paving within the site, and building the walls either side of the new crossover, we approached Highways regards resurfacing the existing crossover. We were told this would need a Section 171, as opposed to a Section 184, which is to create a new crossover from scratch. In deciding method of traffic management we had to consider that the footpath would be out of action for 2 days. As there was no footpath on the other side of the road, we didn’t have the option to simply close the footpath and send the pedestrians over to a footpath on the other side of the road. The pedestrians would have to go in the road, via a dedicated ‘pedestrian walkway’, and for this to be possible we would need 2-way traffic lights to close the lane nearest. This would also enable us to park works vehicles adjacent to the site.
We set up the traffic lights at 8am on day 1. We proceeded to excavate the existing crossover to the required depth for type 1 MOT and for the crossover construction which in Northamptonshire is 100mm of 20mm-size base course, and 20mm of 6mm ‘top-coat’. The area to be laid in tarmac extended beyond the crossover at the front, between the new walls that had been build to the front of the property, and all the way to where the block paving had been laid in the site. The type 1 that had been laid and compacted by the customer was checked for levels and didn’t require any further work.
The spoil was removed from site by the end of day 1 and preparations made to tarmac the following day. On day 2 we arranged for base course to be delivered at 8am, and it arrived shortly after. The tarmac was delivered on a lorry with chutes to the rear, which we used to fill wheelbarrows. The base course was in and laid before 11am. The 6mm ‘top-coat’ was delivered around 1pm and this was in and compacted within an hour and a half.
The new crossover and tarmac laid to the rear of the crossover was cool to walk on within a couple of hours. The traffic lights were taken down ready for the heavier teatime traffic, but we kept traffic off the crossover until the following morning, when it was open and for the customer to use.


Time taken to quote for the works: Less than 1 week
Time taken to obtain Section 171 Licence: 1 week
Leadtime to use S171 Licence: 4 weeks
Time taken to do the work: 2 days
Total time: Just over 6 weeks
Do you need a vehicle crossover doing? Click here to get a quote. Click here to see more Vehicle Crossover case studies.

We were approached our customer in Hardwick, Cambs, for a sewer connection for a new build, which we completed. We were then asked to quote for a vehicle crossover, which the customer had permission to do as part of the planning application.
The crossover was a bit involved as it was on a 40mph road, and it was too busy to close the footpath. We had to put up a pedestrian walkway in the road, to safely divert the pedestrians. We excavated the area, which was quite large for a crossover, and was adjacent to a ‘bellmouth’ of a small shopping precinct next door.
We also had a very heavy manhole cover on a surface water catchpit, which had to be lowered. To do this, we had to reduce the ‘corbled masonry’ and fit a modern ‘biscuit’ on top of the catchpit. We re-fitted the original manhole cover as there was nothing wrong with it.
We laid new edging kerbs at the boundary with the new property. At the road we laid new ‘radius’ kerbs to from the entrance onto the crossover. Stone was laid in layers and compacted with a 120mm roller. Tarmac was laid in two stages, with the base course going down in the morning and 6mm tarmac to finish, in the afternoon.
The traffic management was kept up overnight to give the material time to cool down completely. The next day we returned to lay topsoil and grass seed either side of the new crossover, and cleared the site.
Timeline
Time taken to quote for the works: 1 week
Time taken to obtain Section 184 Licence: 3 weeks
Leadtime to use Licence: 3 weeks
Time taken to do the work: Less than 1 weeks
Total time: 2 months
Testimonial
Our customer was kind enough to leave us a 5-star review on Google:
“Superb company to deal with.
Excellent communication throughout, most helpful in meeting and exceeding time frames all backed up by a great works team who were polite, helpful and supportive whilst on site.
Thank you all 👍👍”
Click here to see more of our Google Reviews
Do you need a crossover doing? Click here and upload your measurements and pictures etc, and we’ll normally get a quote to you within a few days.
Click here to read our FAQs relating to dropped kerbs and vehicle crossovers.


We were pleased to have been approached by James Taylor from Stagsden, Bedfordshire, and invited to quote for groundwork for 2 x new builds. We had previously worked for James’s father whereby we did the groundwork for another new build, again in Bedfordshire
Our objective was to demolish 3 existing farm buildings, which were to be replaced by 2 new dwellings. We were instructed to carrry out demolition, footings for the new builds, masonry to underside of block and beam, installation of block and beam floor, installation of 2 x treatment plants for the new builds and rainwater drainage including soakaways.
Demolition
Our first task on site was to demolish 3 existing farm buildings. Our customer, acting as Principal Contractor, facilitated an asbestos survey, as we suspected at least one of the roofs to be asbestos. The roof was indeed asbestos, and we recommended WJ Redden from Wellingborough, to safely take down the roof and remove the material from site. With the asbestos safely removed, we bought an 8 tonne machine to site, with a grapple bucket attached, and set to demolishing each of the three buildings in turn. The mixed waste was put into skips and removed from site. Any hardcore from the walls and floors was kept on site, to be crushed later on for future use.
Footings
One of the two barns was to be built with a standard concrete ‘strip’ footing, the drawings detailed 1m dig depth, however we proactively went down to 1.2m due to the top of the dig appearing to be made-up ground. Building Control and the Warranty Provider were happy with the dig, and we continued to pour the concrete footings. On the second barn a piled foundation was required, due to the close proximity of trees on site. The customer had instructed a structural engineer to design the ringbeam, which would sit on the piles. A pile design was put together by the same structural engineer and we instructed a third party piling company. The piles were steel casings driven into the ground, welded together as they were dropped in, and then filled with concrete and reinforcing bars. With the piling complete, we broke off the top of each pile and cut the metal casing on each to the correct height, and then bent the reinforcing bar into where our ringbeam would sit. The ringbeam dig was lined with cellcore to the bottom and then permanent formwork installed all round. The ringbeam was constructed on site and each section lowered in and fixed together. Claymaster was required on the inside of the permanent formwork, all part of the design and as a resut of the trees on site. The concrete ringbeam was poured, completing the foundations for both barns.
Drainage
We installed all foul drainage prior to the masonry being done. This included laying underground drainage pipes to the positions of foul stacks inside each barn for the foul. As there is no public sewer in the village, we installed two treatment plants, one for each barn. These were ‘6-person Marsh Ensign’ treatment plants, a modern-day equivalent of a septic tank. These were installed in full concrete surround as per the manufacturer’s specification. We laid a drainage field for each treatment plant, within the site. Soakaways were installed for rainwater drainage, and pipes laid from the downpipe positions on each house, to the soakaways.
Masonry
The oversites were reduced to give 200mm clearance under where the block beam would sit, and then we did the masonry to the underside of the block and beam. This consisted of a total of 300mm, so a block and a brick in most places, on both the inner and outer courses. Facework would be done later on by the building contractor doing the superstructure.
Block and beam
The block and beam was installed, using 150mm beams throughout and 3.5N blocks, and finished with a cement slurry. This concluded this part of the project for us.
A building contractor was instructed to take over soon after we left, but we expect to return to site at a later date when the new dwellings are built, to install services from the Highway, to each barn. With the services in, we will install a road from the Highway to the new barns, at the moment the road is a hardcore track, suitable for construction traffic throughout the build.
It was great to have worked with James on this project, especially as we had worked for his Dad on a similar project many years before. And we look forward to returning at a later date to install the services and to put the final road in.
Time taken to quote for the works: 2 weeks
Time taken to demolish 3 existing barns and remove waste from site: 1 week
Time taken to install foundations for both barns: Total of 3 weeks including piling contractors coming to site
Time taken to install all drainage: 2.5 weeks including installation of 2 x treatment plants and drainage fields
Time taken to do masonry for both barns: 1 week
Time taken to install block and beam: 1 week
Associated works including site set-up and clearing site at end of project: 1 week
Total time on site: 9.5 weeks


Having done many projects for Andrew Robinson & family over the last 15 years, we were pleased to be asked to carry out works for them at their company, Autohome Ltd, in Northampton.
The work was to construct a storage building to ‘dpc’ level, within their office car park.
We were given drawings by our customer which had been put together by Design & Build Projects Ltd from Towcester, whom we have worked with many times in the past. The drawings detailed a standard 1m trench foundation, standard oversight construction but with 200mm reinforced floor, & associated foul & rainwater drainage.
The drawings didn’t ascertain where the surface water was to discharge and needed further investigation, so we met with Andrew on site and lifted various manhole covers, and were pleased to identify a dedicated surface water sewer on site. We checked with Building Control and they were fine for rainwater to be dispersed into this system. We lifted a few thousand block paviors where the build was to go, and put them aside for future use by the customer. The footing was dug to a depth of 1m over two days, and the concrete poured on the second day. We reduced the oversite to the required level on a third day and made preparations for our bricklayer to come to site to lay blockwork to dpc level.
The cavity was filled with Gen1 concrete the day after the masonry was completed, and we spent a few days completing the foul, surface water and some ductwork to the new building. We poured the oversite as a 200mm concrete slab using Gen 3 concrete, and with 1 layer of reinforcing mesh. At the front of the new building we created a ramp with some of the block paviors we had put to one side, after which the job was complete.
With the groundwork complete, we handed the site back to the customer, for him to carry on with different trades to continue the superstructure. The job was quite a small one for us, but we were glad to undertake this work for a long-time customer of ours. If you have a similar project you’d like us to quote for you, please contact us using our online form, and choose ‘New Builds & Extensions’ from the drop-down list.
Customer Review:
Andrew was very complimentary of our work, leaving us the following 5-star review on Google:
“Excellent job as always, under the ever watchful eye of Mark”
Time taken to quote for the works: Less than 1 week
JWC Leadtime until work could be started: 6 weeks
Time taken to carry out the work: Just over 2 weeks including work done by our subcontract bricklayers


